THE FIELD GUIDE
Durandal in The Blood of Dawnwalker
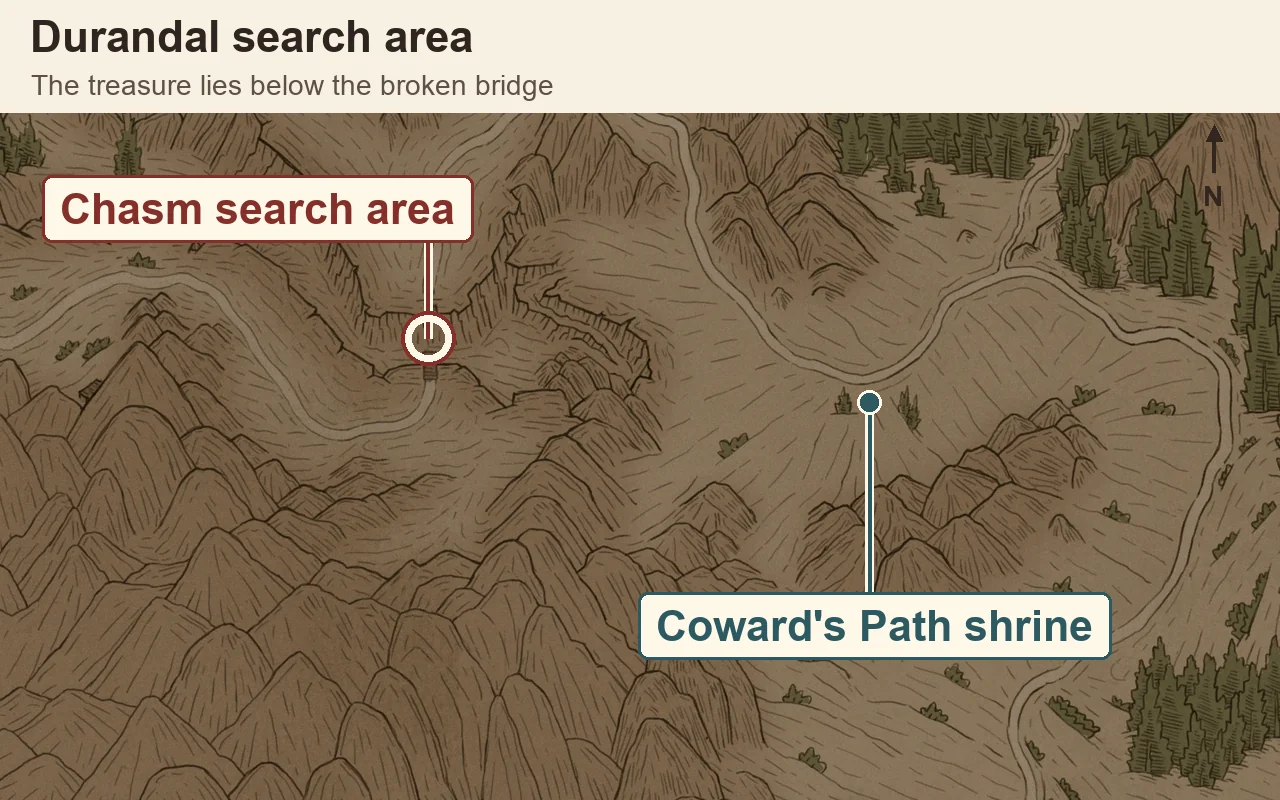
Durandal is a Legendary longsword found in the wreckage below the broken bridge west of Coward’s Path Shrine. Recovering it completes The Cursed Chasm and costs two time segments.
Where to find Durandal
Start from Coward’s Path Shrine in Briar Sloughs, below Greifberg Castle, and follow the road west toward the broken bridge. Inspect the ruined cart on the bridge for a written lead about Skender’s lost treasure. That cart holds the clue; the sword is in the wreckage on the chasm floor.
The Cursed Chasm is available once the prologue ends and free exploration opens. Approaching the bridge or the wreckage can start it directly. If you are already in Svartrau and want the lead before travelling, ask the Altenmarkt innkeeper in the northern part of the city about local gossip. This is an alternative starting point, so you can continue from the shrine without visiting the inn.
Choose a day or night descent
During the day, head to the eastern side of the chasm and look down to locate the rocky path below. Follow the rim northwest until it meets the beginning of that path, then take it down. Looking for this connection is more useful than trying to descend directly from the broken end of the bridge.
A gap interrupts the path. The ledge across it is higher than your take-off point, but a normal running jump reaches it. Give yourself room for the run-up, jump across, and continue down toward the wreckage.
At night, you can use Clawride for the descent instead. Approach the cliff edge and look down at the rock face, then activate Clawride to slide down with Coen’s claws. Use the wall descent rather than stepping off the rim for a free fall.
Deal with the enemies around the wreckage
Prepare for a crowded encounter before approaching the wagon. Assign healing consumables to quick slots, and consider equipment or consumables that increase damage against supernatural enemies for the spirits.
Wolves can engage first, with ordinary Vidmo spirits and the red spirit Echo joining shortly after combat begins. Echo can also create spectral forms, adding to the crowd in the narrow fighting area. Keep the red wraith in view as the fight develops so that another spirit does not draw all your attention away from it.
Clear the wolves first to reduce the number of attackers. Their block cue appears noticeably before the actual pounce: use it to prepare, then time a Perfect Block to the lunge. A successful Perfect Block makes Coen kick the wolf, giving you an opening for a follow-up strike.
Once you can concentrate on Echo, watch its repeated claw slashes and defend through the sequence before attacking back. The red skull warning marks an unblockable attack from Echo or another spirit; dodge clear of that sequence instead of trying to block the frenzy.
Echo’s teleportation can break up your pursuit. When its health is low, watch for it to move away and begin restoring health. Close the distance and land an attack to interrupt the recovery. This makes stamina management especially useful near the end of the fight: leave enough for the approach and the hit instead of spending the entire bar on the preceding combo. If you repeatedly lose progress to healing, shorten that combo so you can respond to the retreat.
Search the wagon and take the sword
After clearing the enemies, look for the skeleton beneath the gold highlight and read Final Report. The glow is visible even without Focus Mode, which helps you pick out this investigation point among the remains.
Next, activate Focus Mode and inspect the wreckage. Several objects can be highlighted as lootable, but the interaction that yields Durandal is on the broken wagon remains. Search that object to recover the sword. If you have only collected enemy drops or read the report, continue to the wagon instead of leaving with the investigation unfinished.
Searching the treasure completes The Cursed Chasm and spends two time segments. Account for those segments at this interaction, especially if you have a timed appointment or another quest close to its deadline.
The loot also includes Recipe for Minor Balm of Fortitude. It unlocks a preparation that reduces non-magical damage taken. Collect it with the sword if you craft defensive consumables; the recipe entry below lists the ingredients.
There is also a useful follow-up to collect before leaving: Treasure Map: Silver Cache, found among the wreckage. Reading it starts Finders Keepers. Take it if you want another treasure route after this trip; the silver-cache guide below covers the actual search and digging location.
Durandal’s base stats and effects
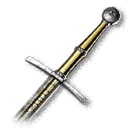
Durandal is a Legendary longsword; the weapon catalogue names that rarity tier Unique. The table lists its base item profile from PC build 25129649. Item level and character bonuses affect the inventory display.
| Attribute | Base value |
|---|---|
| Weapon type | Longsword |
| Damage | 46–66 |
| Weight | 1.5 |
| Attack stamina cost | −15% |
| Dodge stamina cost | −15% |
| Sword ability cooldown | −5% |
| Damage against supernatural enemies | +8% |
 Select Durandal in the weapon catalogue
When Durandal is worth using
Durandal is worth considering when repeated sword attacks and dodges compete for your stamina, especially against supernatural enemies. If Omniblock is your main defence, use the comparison with The Purge below to weigh the alternative defensive bonuses before investing in either sword.
Check the item level of the copy you recovered against your current weapon. A sword that needs several upgrades is an investment as well as a combat choice: compare at equal item levels, then use the upgrade calculator to price the gap. If the cost would delay more useful equipment upgrades, keep Durandal for later rather than replacing a stronger current sword solely for its rarity. Build Planner lets you examine the swap while keeping the rest of your equipment fixed.