THE WORLD OF VALE SANGORA
Dawnwalker Bosses
Find the encounter you are preparing for, check its attack patterns and follow the relevant quest or reward. These eight named profiles include the boyars, Brencis, Leonica, Mihai, Isbrand and Lacra.
Prepare for the encounter
Boss access and rewards depend on the quest and, for draining, the time of day. The cards separate those decisions from attack patterns. Open a named profile to compare its base values at the enemy’s level.
Boss encounters
Search an encounter, open its quest connections and compare the named combat profile at the level you need.
8 boss encounters

Vampire boyar · Supernatural
Ambrus
Ambrus’s challenge ends in a duel above Maragir. Preparing Iulian’s poisoned drink changes the opening, while a nighttime victory can unlock Scarlet Shield.
Maragir Wealds
Before the duel
Complete activities marked with Ambrus’s twin-headed dragon to provoke his invitation to The Gilded Gauntlet. The Bittersweet Toast is Iulian’s optional preparation: finish its ritual before ringing the bell above Maragir.
If the drink was poisoned, decline the first offer of Iulian’s blood. Drinking it yourself poisons Coen; allowing Ambrus to drink first preserves the intended advantage.
Attack openings and the reward
Dodge away from his sweeping unblockable attack. When Scarlet Shield appears, conserve resources while it absorbs damage and restores his health. In the final health segment, defend against the copies and wait for the real Ambrus; striking a copy does not damage him.
Defeating and draining him at night grants Scarlet Shield. Draining him after the poisoning also poisons Coen. The later invitation to his soul is a separate choice.
Rewards, quests and connections
Useful next steps
Character and story
Related quests
- A Good Deed Is Its Own Reward
- Ambrus's Cellars: Seeing Red
- Ambrus's Cellars: Trouble Brewing
- Ambrus's Cellars: Uninvited
- Ambrus's Collectors: Bounty of the Mire
- Ambrus's Collectors: Unsavoury Solutions
- Ambrus's Collectors: Wetland Helpers
- Ambrus's Dungeons
- Ambrus's Dungeons: Judge and Executioner
- Ambrus's Dungeons: Twists and Turns
- Ambrus's Prisoner Transports
- Ambrus's Prisoners: Fate's Mercy
- Ambrus's Prisoners: Lucky Crossing
- Ambrus's Transports: Bloody Business
- Ambrus's Transports: Roadside Surprise
Regional context
Possible loot
Loot can vary. A list of possible items is not a promise that one encounter gives all of them.
Combat values by enemy level
Ambrus, the Right Fist of the Knyaz
Base enemy values before difficulty and combat modifiers. Choose the enemy’s level, which can differ from Coen’s level. An unlisted value is not zero.
| Enemy level | Health segments | Health per segment | Base melee damage | Base magic damage |
|---|---|---|---|---|
| 1 | 1 | 1000 | 32 | 35 |
| 2 | 1 | 1000 | 45 | 49 |
| 3 | 1 | 1000 | 58 | 63 |
| 4 | 1 | 1320 | 72 | 78 |
| 5 | 1 | 1640 | 86 | 94 |
| 6 | 1 | 1960 | 100 | 109 |
| 7 | 1 | 2280 | 115 | 126 |
| 8 | 1 | 2600 | 130 | 142 |
| 9 | 1 | 3286 | 146 | 159 |
| 10 | 1 | 4040 | 162 | 177 |
| 11 | 1 | 4514 | 182 | 199 |
| 12 | 1 | 5007 | 203 | 222 |
| 13 | 1 | 5519 | 225 | 246 |
| 14 | 1 | 6052 | 248 | 271 |
| 15 | 1 | 6606 | 272 | 297 |
| 16 | 1 | 7182 | 297 | 325 |
| 17 | 1 | 8653 | 324 | 354 |
| 18 | 1 | 10270 | 344 | 377 |
| 19 | 1 | 11549 | 365 | 400 |
| 20 | 1 | 13506 | 387 | 424 |
| 21 | 1 | 15659 | 410 | 448 |
| 22 | 1 | 16747 | 433 | 473 |
| 23 | 1 | 19352 | 457 | 499 |
| 24 | 1 | 22217 | 481 | 526 |
| 25 | 1 | 25369 | 513 | 561 |
| 26 | 1 | 28836 | 545 | 597 |
| 27 | 1 | 32650 | 580 | 634 |
| 28 | 1 | 34638 | 615 | 673 |
| 29 | 1 | 39253 | 652 | 713 |
| 30 | 1 | 40987 | 690 | 755 |
| 31 | 1 | 42825 | 730 | 799 |
| 32 | 1 | 44773 | 772 | 844 |
| 33 | 1 | 46838 | 815 | 891 |
| 34 | 1 | 47687 | 860 | 940 |
| 35 | 1 | 48561 | 907 | 992 |
| 36 | 1 | 49461 | 942 | 1030 |
| 37 | 1 | 50389 | 978 | 1069 |
| 38 | 1 | 51344 | 1015 | 1110 |
| 39 | 1 | 52328 | 1053 | 1152 |
| 40 | 1 | 53342 | 1092 | 1195 |
| 41 | 1 | 54385 | 1133 | 1239 |
| 42 | 1 | 55461 | 1175 | 1285 |
| 43 | 1 | 56568 | 1218 | 1332 |
| 44 | 1 | 57709 | 1262 | 1380 |
| 45 | 1 | 58883 | 1307 | 1430 |
| 46 | 1 | 60094 | 1354 | 1481 |
| 47 | 1 | 61340 | 1403 | 1534 |
| 48 | 1 | 62624 | 1453 | 1589 |
| 49 | 1 | 63946 | 1504 | 1645 |
| 50 | 1 | 65308 | 1557 | 1703 |
The recorded day and night values are the same for this profile.

Vampire boyar · Supernatural
Bakir
Bakir’s Lunar Game leads through a combat maze to a confrontation at Lunar Manor. The way you handle the contestants affects the chance to face him alone.
The Silts
Reach the confrontation
After Bakir’s anger draws his challenge, meet Farkas outside Lunar Manor. Use the preparation window before the afternoon contest to improve your equipment. The maze restricts Vampiric Abilities and provides replacement gear along the route.
Talking to the Porcupine can avoid a fight, and poisoning the liquor can disable the Cockroach encounter. At the prize conversation, the yellow dialogue route can lead to a private meeting; removing the mask immediately starts combat with his guards.
Fight and aftermath
Watch for punches, blood lines and the unblockable bird volley. Move sideways out of the ranged attacks before closing for a short counter.
A kill allows you to take Bakir’s Armour, while draining him unlocks Shadowstorm. If you fought in the courtyard, revisit the body after Farkas takes you to the treasure room. The Ring is a separate follow-up choice.
Rewards, quests and connections
Useful next steps
Character and story
Related quests
- Bakir's Distilleries: Coercion and Duress
- Bakir's Distilleries: Ends and Means
- Bakir's Distilleries: Offshoot
- Bakir's Headhunters: Matter of Honour
- Bakir's Headhunters: Silent to the Grave
- Bakir's Headhunters: Smoke Them Out
- Bakir's Pillories: Familiar Face
- Bakir's Pillories: Old Hand
- Bakir's Pillories: Out of Love
- Bakir's Transports: Curious Shipment
- Bakir's Transports: Ill-Gotten Gains
Regional context
Possible loot
Loot can vary. A list of possible items is not a promise that one encounter gives all of them.
Combat values by enemy level
Bakir, the Mad Khan
Base enemy values before difficulty and combat modifiers. Choose the enemy’s level, which can differ from Coen’s level. An unlisted value is not zero.
| Enemy level | Health segments | Health per segment | Base melee damage | Base magic damage |
|---|---|---|---|---|
| 1 | 3 | 450 | 34 | 35 |
| 2 | 3 | 450 | 48 | 49 |
| 3 | 3 | 450 | 62 | 63 |
| 4 | 3 | 594 | 76 | 78 |
| 5 | 3 | 738 | 91 | 94 |
| 6 | 3 | 882 | 106 | 109 |
| 7 | 3 | 1026 | 122 | 126 |
| 8 | 3 | 1170 | 138 | 142 |
| 9 | 3 | 1479 | 155 | 159 |
| 10 | 3 | 1818 | 172 | 177 |
| 11 | 3 | 2031 | 193 | 199 |
| 12 | 3 | 2253 | 215 | 222 |
| 13 | 3 | 2484 | 239 | 246 |
| 14 | 3 | 2723 | 263 | 271 |
| 15 | 3 | 2973 | 289 | 297 |
| 16 | 3 | 3232 | 316 | 325 |
| 17 | 3 | 3894 | 344 | 354 |
| 18 | 3 | 4622 | 366 | 377 |
| 19 | 3 | 5197 | 388 | 400 |
| 20 | 3 | 6078 | 411 | 424 |
| 21 | 3 | 7046 | 435 | 448 |
| 22 | 3 | 7536 | 460 | 473 |
| 23 | 3 | 8708 | 485 | 499 |
| 24 | 3 | 9998 | 511 | 526 |
| 25 | 3 | 11416 | 545 | 561 |
| 26 | 3 | 12976 | 580 | 597 |
| 27 | 3 | 14692 | 616 | 634 |
| 28 | 3 | 15587 | 654 | 673 |
| 29 | 3 | 17664 | 693 | 713 |
| 30 | 3 | 18444 | 734 | 755 |
| 31 | 3 | 19271 | 776 | 799 |
| 32 | 3 | 20148 | 820 | 844 |
| 33 | 3 | 21077 | 866 | 891 |
| 34 | 3 | 21459 | 914 | 940 |
| 35 | 3 | 21852 | 963 | 992 |
| 36 | 3 | 22258 | 1000 | 1030 |
| 37 | 3 | 22675 | 1039 | 1069 |
| 38 | 3 | 23105 | 1078 | 1110 |
| 39 | 3 | 23548 | 1119 | 1152 |
| 40 | 3 | 24004 | 1160 | 1195 |
| 41 | 3 | 24473 | 1204 | 1239 |
| 42 | 3 | 24957 | 1248 | 1285 |
| 43 | 3 | 25456 | 1294 | 1332 |
| 44 | 3 | 25969 | 1341 | 1380 |
| 45 | 3 | 26498 | 1389 | 1430 |
| 46 | 3 | 27042 | 1439 | 1481 |
| 47 | 3 | 27603 | 1491 | 1534 |
| 48 | 3 | 28181 | 1543 | 1589 |
| 49 | 3 | 28776 | 1598 | 1645 |
| 50 | 3 | 29389 | 1654 | 1703 |
The recorded day and night values are the same for this profile.
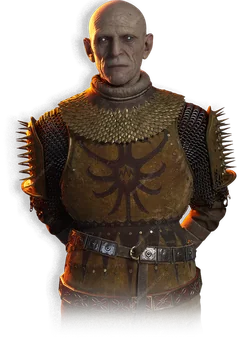
Knyaz of Vale Sangora · Supernatural
Brencis
The final confrontation with Brencis begins with sword and blood attacks in Greifberg Castle, then changes into a tentacled battle in Anachora.
Greifberg Castle · Anachora
Prepare for both phases
Finish healing and equip your abilities before entering the final chamber. Keep a separate save before departing for Greifberg if you want to compare ending routes; the family rescue still depends on the campaign deadline.
Sword phase
A red-skull opening can continue into a normal swing and another unblockable strike. Avoid the entire sequence instead of attacking after its middle hit. A normal opening gives a better parry opportunity and space for a brief counter.
Dodge sideways from his leap and blood javelin. The leap’s landing offers a short opening; the low advancing two-handed swipe instead calls for distance backward.
Anachora phase
Leave the line of overhead tentacle strikes and move away from sweeping attacks. Sidestep the Piercing Shriek cone, retreat from airborne slams and leave the large glyph under Coen before its draining attack.
Later ground pounds advance in a sequence. Move out of their path and keep counters short. Manifestations may add Xanthe’s floor glyphs or Ambrus’s copies, so continue watching for their attacks.
Choices after the fight
Bowing in the earlier conversation accepts a bargain; inviting Brencis in after defeating him is a later decision. Use the ending guide to compare those choices with the ally or solo route you brought into the castle.
Rewards, quests and connections
Useful next steps
Character and story
Related quests
- A Bulwark Against Darkness
- A Deal with the Devil
- A Friend Like This
- A Monk and a Saint
- Bad Blood
- Banner of Oppression: Dragosti Gate
- Banner of Oppression: The North-East Gate
- Banner of Oppression: The North-West Gate
- Banner of Oppression: The South Gate
- Banner of Oppression: The West Gate
- Blasphemy
- Destroyed Shrines: Hidden & Safe
- Forge It Anew
- Hive and Seek
- Midnight Reckoning
- Our Rotten Roots
- Sacred Covenant
- Smoke and Ashes
- Song of the Mountain
- The Firebrand
- The Night of Horrors
- What Hunts the Night
- What Moves the Dead
- Where Loyalty Lies
People and creatures
Regional context
Possible loot
Loot can vary. A list of possible items is not a promise that one encounter gives all of them.
Combat values by enemy level
Brencis, the Knyaz of Vale Sangora
Base enemy values before difficulty and combat modifiers. Choose the enemy’s level, which can differ from Coen’s level. An unlisted value is not zero.
| Enemy level | Health segments | Health per segment | Base melee damage | Base magic damage |
|---|---|---|---|---|
| 1 | 3 | 700 | 34 | 35 |
| 2 | 3 | 700 | 48 | 49 |
| 3 | 3 | 700 | 62 | 63 |
| 4 | 3 | 924 | 76 | 78 |
| 5 | 3 | 1148 | 91 | 94 |
| 6 | 3 | 1372 | 106 | 109 |
| 7 | 3 | 1596 | 122 | 126 |
| 8 | 3 | 1820 | 138 | 142 |
| 9 | 3 | 2300 | 155 | 159 |
| 10 | 3 | 2828 | 172 | 177 |
| 11 | 3 | 3160 | 193 | 199 |
| 12 | 3 | 3505 | 215 | 222 |
| 13 | 3 | 3863 | 239 | 246 |
| 14 | 3 | 4236 | 263 | 271 |
| 15 | 3 | 4624 | 289 | 297 |
| 16 | 3 | 5028 | 316 | 325 |
| 17 | 3 | 6057 | 344 | 354 |
| 18 | 3 | 7189 | 366 | 377 |
| 19 | 3 | 8084 | 388 | 400 |
| 20 | 3 | 9454 | 411 | 424 |
| 21 | 3 | 10961 | 435 | 448 |
| 22 | 3 | 11723 | 460 | 473 |
| 23 | 3 | 13546 | 485 | 499 |
| 24 | 3 | 15552 | 511 | 526 |
| 25 | 3 | 17758 | 545 | 561 |
| 26 | 3 | 20185 | 580 | 597 |
| 27 | 3 | 22855 | 616 | 634 |
| 28 | 3 | 24247 | 654 | 673 |
| 29 | 3 | 27477 | 693 | 713 |
| 30 | 3 | 28691 | 734 | 755 |
| 31 | 3 | 29977 | 776 | 799 |
| 32 | 3 | 31341 | 820 | 844 |
| 33 | 3 | 32787 | 866 | 891 |
| 34 | 3 | 33381 | 914 | 940 |
| 35 | 3 | 33993 | 963 | 992 |
| 36 | 3 | 34623 | 1000 | 1030 |
| 37 | 3 | 35272 | 1039 | 1069 |
| 38 | 3 | 35941 | 1078 | 1110 |
| 39 | 3 | 36630 | 1119 | 1152 |
| 40 | 3 | 37339 | 1160 | 1195 |
| 41 | 3 | 38070 | 1204 | 1239 |
| 42 | 3 | 38822 | 1248 | 1285 |
| 43 | 3 | 39598 | 1294 | 1332 |
| 44 | 3 | 40396 | 1341 | 1380 |
| 45 | 3 | 41218 | 1389 | 1430 |
| 46 | 3 | 42066 | 1439 | 1481 |
| 47 | 3 | 42938 | 1491 | 1534 |
| 48 | 3 | 43837 | 1543 | 1589 |
| 49 | 3 | 44762 | 1598 | 1645 |
| 50 | 3 | 45716 | 1654 | 1703 |
The recorded day and night values are the same for this profile.

Brencis's sire · Supernatural
Isbrand
Isbrand, the Broken Shade, is tied to Lacra’s search for the vrakhir who turned Brencis. His encounter profile is separate from Brencis’s final battle.
Follow Lacra’s investigation
Song of the Mountain and Hive and Seek lead through the Uriashi village and the kobold investigation. Our Rotten Roots then follows Lacra into Isbrand’s memories. Use the questline guide for the order, access conditions and choices.
Brencis left Isbrand in a mountain cave, where kobolds kept him alive as a regenerating food source. The named combat profile below has its own health segments and level scaling.
Rewards, quests and connections
Useful next steps
Character and story
Combat values by enemy level
Isbrand, The Broken Shade
Base enemy values before difficulty and combat modifiers. Choose the enemy’s level, which can differ from Coen’s level. An unlisted value is not zero.
| Enemy level | Health segments | Health per segment | Base melee damage | Base magic damage |
|---|---|---|---|---|
| 1 | 6 | 200 | 26 | 26 |
| 2 | 6 | 200 | 36 | 36 |
| 3 | 6 | 200 | 47 | 47 |
| 4 | 6 | 264 | 58 | 58 |
| 5 | 6 | 328 | 70 | 70 |
| 6 | 6 | 392 | 81 | 81 |
| 7 | 6 | 456 | 93 | 93 |
| 8 | 6 | 520 | 106 | 106 |
| 9 | 6 | 657 | 118 | 118 |
| 10 | 6 | 808 | 132 | 132 |
| 11 | 6 | 903 | 148 | 148 |
| 12 | 6 | 1001 | 165 | 165 |
| 13 | 6 | 1104 | 183 | 183 |
| 14 | 6 | 1210 | 201 | 201 |
| 15 | 6 | 1321 | 221 | 221 |
| 16 | 6 | 1436 | 241 | 241 |
| 17 | 6 | 1731 | 263 | 263 |
| 18 | 6 | 2054 | 280 | 280 |
| 19 | 6 | 2310 | 297 | 297 |
| 20 | 6 | 2701 | 315 | 315 |
| 21 | 6 | 3132 | 333 | 333 |
| 22 | 6 | 3349 | 352 | 352 |
| 23 | 6 | 3870 | 371 | 371 |
| 24 | 6 | 4443 | 391 | 391 |
| 25 | 6 | 5074 | 417 | 417 |
| 26 | 6 | 5767 | 443 | 443 |
| 27 | 6 | 6530 | 471 | 471 |
| 28 | 6 | 6928 | 500 | 500 |
| 29 | 6 | 7851 | 530 | 530 |
| 30 | 6 | 8197 | 561 | 561 |
| 31 | 6 | 8565 | 593 | 593 |
| 32 | 6 | 8955 | 627 | 627 |
| 33 | 6 | 9368 | 662 | 662 |
| 34 | 6 | 9537 | 699 | 699 |
| 35 | 6 | 9712 | 737 | 737 |
| 36 | 6 | 9892 | 765 | 765 |
| 37 | 6 | 10078 | 794 | 794 |
| 38 | 6 | 10269 | 824 | 824 |
| 39 | 6 | 10466 | 855 | 855 |
| 40 | 6 | 10668 | 887 | 887 |
| 41 | 6 | 10877 | 920 | 920 |
| 42 | 6 | 11092 | 954 | 954 |
| 43 | 6 | 11314 | 989 | 989 |
| 44 | 6 | 11542 | 1025 | 1025 |
| 45 | 6 | 11777 | 1062 | 1062 |
| 46 | 6 | 12019 | 1100 | 1100 |
| 47 | 6 | 12268 | 1140 | 1140 |
| 48 | 6 | 12525 | 1180 | 1180 |
| 49 | 6 | 12789 | 1222 | 1222 |
| 50 | 6 | 13062 | 1265 | 1265 |
The recorded day and night values are the same for this profile.

Vrakhir envoy · Supernatural
Lacra
Lacra is both a possible ally against Brencis and a named combat encounter. Her quests and late decisions determine how that relationship develops.
Keep the quest choices in view
Her route runs through the Uriashi village, the kobold search and Anachora. Midnight Reckoning later asks Coen to choose a route toward the final assault. Read the quest warnings before committing if you want her involvement to continue.
The Lacra, the Envoy profile below describes combat values. Her character entry covers her role and relationships; the questline guide carries the complete sequence and consequences.
Rewards, quests and connections
Useful next steps
Character and story
Related quests
Possible loot
Loot can vary. A list of possible items is not a promise that one encounter gives all of them.
Combat values by enemy level
Lacra, the Envoy
Base enemy values before difficulty and combat modifiers. Choose the enemy’s level, which can differ from Coen’s level. An unlisted value is not zero.
| Enemy level | Health segments | Health per segment | Base melee damage | Base magic damage |
|---|---|---|---|---|
| 1 | 9 | 100 | 27 | 0 |
| 2 | 9 | 100 | 38 | 0 |
| 3 | 9 | 100 | 49 | 0 |
| 4 | 9 | 132 | 60 | 0 |
| 5 | 9 | 164 | 72 | 0 |
| 6 | 9 | 196 | 84 | 0 |
| 7 | 9 | 228 | 97 | 0 |
| 8 | 9 | 260 | 110 | 0 |
| 9 | 9 | 329 | 123 | 0 |
| 10 | 9 | 404 | 137 | 0 |
| 11 | 9 | 451 | 153 | 0 |
| 12 | 9 | 501 | 171 | 0 |
| 13 | 9 | 552 | 190 | 0 |
| 14 | 9 | 605 | 209 | 0 |
| 15 | 9 | 661 | 229 | 0 |
| 16 | 9 | 718 | 251 | 0 |
| 17 | 9 | 865 | 273 | 0 |
| 18 | 9 | 1027 | 290 | 0 |
| 19 | 9 | 1155 | 308 | 0 |
| 20 | 9 | 1351 | 327 | 0 |
| 21 | 9 | 1566 | 346 | 0 |
| 22 | 9 | 1675 | 365 | 0 |
| 23 | 9 | 1935 | 385 | 0 |
| 24 | 9 | 2222 | 406 | 0 |
| 25 | 9 | 2537 | 433 | 0 |
| 26 | 9 | 2884 | 460 | 0 |
| 27 | 9 | 3265 | 489 | 0 |
| 28 | 9 | 3464 | 519 | 0 |
| 29 | 9 | 3925 | 550 | 0 |
| 30 | 9 | 4099 | 582 | 0 |
| 31 | 9 | 4282 | 616 | 0 |
| 32 | 9 | 4477 | 651 | 0 |
| 33 | 9 | 4684 | 688 | 0 |
| 34 | 9 | 4769 | 726 | 0 |
| 35 | 9 | 4856 | 765 | 0 |
| 36 | 9 | 4946 | 794 | 0 |
| 37 | 9 | 5039 | 825 | 0 |
| 38 | 9 | 5134 | 856 | 0 |
| 39 | 9 | 5233 | 888 | 0 |
| 40 | 9 | 5334 | 922 | 0 |
| 41 | 9 | 5439 | 956 | 0 |
| 42 | 9 | 5546 | 991 | 0 |
| 43 | 9 | 5657 | 1027 | 0 |
| 44 | 9 | 5771 | 1065 | 0 |
| 45 | 9 | 5888 | 1103 | 0 |
| 46 | 9 | 6009 | 1143 | 0 |
| 47 | 9 | 6134 | 1184 | 0 |
| 48 | 9 | 6262 | 1226 | 0 |
| 49 | 9 | 6395 | 1269 | 0 |
| 50 | 9 | 6531 | 1314 | 0 |
The recorded day and night values are the same for this profile.
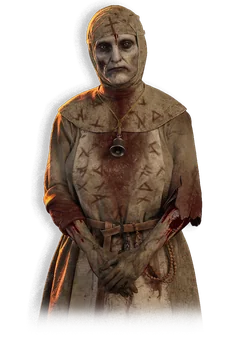
Nun of St. Tyna's · Supernatural
Leonica
Leonica waits beneath St. Tyna’s Convent during Echoes of Silenced Bells. Her teleporting attacks and summoned nuns are followed by Anca’s decision about the ritual.
St. Tyna's Grove
Get through the convent
The courtyard nuns rise again after defeat. Use the Monastery Keys and Campana Loquitur instructions to ring three bells and gather them in the chapel, clearing Anca’s route. Four bells sends them toward the infirmary; five does not fully clear the courtyard.
Fight and ritual
Track Leonica when she teleports, dodge the crows and back away from the burst of bones around her. When she disappears, defeat her summoned nuns to make her return. These summons can be cleared even though the courtyard nuns revive.
Allowing Anca’s ritual afterward costs two time segments and lifts the curse. Burning the notes leaves it in place. This decision is separate from Anca’s later Font of Life reward.
Search after victory
Check Leonica’s body for her ring, Catacombs Key and an Unholy Vitality Manual. The chest along the chamber’s eastern wall is another manual pickup. Keep the keys distinct: the infirmary, monastery and catacombs have different locks.
Rewards, quests and connections
Useful next steps
Character and story
Possible loot
Loot can vary. A list of possible items is not a promise that one encounter gives all of them.
Combat values by enemy level
Leonica, She Who Speaks with the Devil
Base enemy values before difficulty and combat modifiers. Choose the enemy’s level, which can differ from Coen’s level. An unlisted value is not zero.
| Enemy level | Health segments | Health per segment | Base melee damage | Base magic damage |
|---|---|---|---|---|
| 1 | 3 | 10 | 26 | 30 |
| 2 | 3 | 10 | 36 | 42 |
| 3 | 3 | 10 | 47 | 54 |
| 4 | 3 | 13 | 58 | 67 |
| 5 | 3 | 16 | 70 | 80 |
| 6 | 3 | 20 | 81 | 94 |
| 7 | 3 | 23 | 93 | 108 |
| 8 | 3 | 26 | 106 | 122 |
| 9 | 3 | 33 | 118 | 137 |
| 10 | 3 | 40 | 132 | 152 |
| 11 | 3 | 45 | 148 | 171 |
| 12 | 3 | 50 | 165 | 190 |
| 13 | 3 | 55 | 183 | 211 |
| 14 | 3 | 61 | 201 | 232 |
| 15 | 3 | 66 | 221 | 255 |
| 16 | 3 | 72 | 241 | 279 |
| 17 | 3 | 87 | 263 | 303 |
| 18 | 3 | 103 | 280 | 323 |
| 19 | 3 | 115 | 297 | 343 |
| 20 | 3 | 135 | 315 | 363 |
| 21 | 3 | 157 | 333 | 384 |
| 22 | 3 | 167 | 352 | 406 |
| 23 | 3 | 194 | 371 | 428 |
| 24 | 3 | 222 | 391 | 451 |
| 25 | 3 | 254 | 417 | 481 |
| 26 | 3 | 288 | 443 | 511 |
| 27 | 3 | 326 | 471 | 543 |
| 28 | 3 | 346 | 500 | 577 |
| 29 | 3 | 393 | 530 | 611 |
| 30 | 3 | 410 | 561 | 647 |
| 31 | 3 | 428 | 593 | 685 |
| 32 | 3 | 448 | 627 | 724 |
| 33 | 3 | 468 | 662 | 764 |
| 34 | 3 | 477 | 699 | 806 |
| 35 | 3 | 486 | 737 | 850 |
| 36 | 3 | 495 | 765 | 883 |
| 37 | 3 | 504 | 794 | 916 |
| 38 | 3 | 513 | 824 | 951 |
| 39 | 3 | 523 | 855 | 987 |
| 40 | 3 | 533 | 887 | 1024 |
| 41 | 3 | 544 | 920 | 1062 |
| 42 | 3 | 555 | 954 | 1101 |
| 43 | 3 | 566 | 989 | 1141 |
| 44 | 3 | 577 | 1025 | 1183 |
| 45 | 3 | 589 | 1062 | 1226 |
| 46 | 3 | 601 | 1100 | 1270 |
| 47 | 3 | 613 | 1140 | 1315 |
| 48 | 3 | 626 | 1180 | 1362 |
| 49 | 3 | 639 | 1222 | 1410 |
| 50 | 3 | 653 | 1265 | 1460 |
The recorded day and night values are the same for this profile.

Dawnwalker · Supernatural
Mihai
Mihai’s encounter beneath Svartrau Cathedral starts the broken-sword restoration route. Different investigations can reach the crypt, but both lead to the sword reward.
Svartrau City
Enter the crypt
A Monk and a Saint can follow the Night Terrors investigation or the alternate A Dubious Gift route. Choosing one closes the other route for that playthrough. Use the cathedral records and Mihai’s symbol to reach the crypt.
Fight and collect the sword
Mihai uses sword attacks and has a large health pool. Keep enough stamina to defend between short counters. His timed dialogue after the fight does not change the main reward: Broken Sword of St. Mihai.
Use Focus to find Broken Chains and Worn Sheath in the room as well. Continue Forge It Anew with the other sword pieces and Nareh; restoring the weapon and imbuing it are separate stages.
Rewards, quests and connections
Useful next steps
Character and story
People and creatures
Combat values by enemy level
Mihai, Patron Saint of the Cathedral
Base enemy values before difficulty and combat modifiers. Choose the enemy’s level, which can differ from Coen’s level. An unlisted value is not zero.
| Enemy level | Health segments | Health per segment | Base melee damage | Base magic damage |
|---|---|---|---|---|
| 1 | 9 | 120 | 28 | 0 |
| 2 | 9 | 120 | 39 | 0 |
| 3 | 9 | 120 | 51 | 0 |
| 4 | 9 | 158 | 63 | 0 |
| 5 | 9 | 197 | 75 | 0 |
| 6 | 9 | 235 | 87 | 0 |
| 7 | 9 | 274 | 100 | 0 |
| 8 | 9 | 312 | 114 | 0 |
| 9 | 9 | 394 | 128 | 0 |
| 10 | 9 | 485 | 142 | 0 |
| 11 | 9 | 542 | 159 | 0 |
| 12 | 9 | 601 | 177 | 0 |
| 13 | 9 | 662 | 197 | 0 |
| 14 | 9 | 726 | 217 | 0 |
| 15 | 9 | 793 | 238 | 0 |
| 16 | 9 | 862 | 260 | 0 |
| 17 | 9 | 1038 | 283 | 0 |
| 18 | 9 | 1232 | 301 | 0 |
| 19 | 9 | 1386 | 320 | 0 |
| 20 | 9 | 1621 | 339 | 0 |
| 21 | 9 | 1879 | 358 | 0 |
| 22 | 9 | 2010 | 379 | 0 |
| 23 | 9 | 2322 | 400 | 0 |
| 24 | 9 | 2666 | 421 | 0 |
| 25 | 9 | 3044 | 449 | 0 |
| 26 | 9 | 3460 | 477 | 0 |
| 27 | 9 | 3918 | 507 | 0 |
| 28 | 9 | 4157 | 538 | 0 |
| 29 | 9 | 4710 | 570 | 0 |
| 30 | 9 | 4918 | 604 | 0 |
| 31 | 9 | 5139 | 639 | 0 |
| 32 | 9 | 5373 | 675 | 0 |
| 33 | 9 | 5621 | 713 | 0 |
| 34 | 9 | 5722 | 752 | 0 |
| 35 | 9 | 5827 | 793 | 0 |
| 36 | 9 | 5935 | 824 | 0 |
| 37 | 9 | 6047 | 855 | 0 |
| 38 | 9 | 6161 | 888 | 0 |
| 39 | 9 | 6279 | 921 | 0 |
| 40 | 9 | 6401 | 956 | 0 |
| 41 | 9 | 6526 | 991 | 0 |
| 42 | 9 | 6655 | 1028 | 0 |
| 43 | 9 | 6788 | 1065 | 0 |
| 44 | 9 | 6925 | 1104 | 0 |
| 45 | 9 | 7066 | 1144 | 0 |
| 46 | 9 | 7211 | 1185 | 0 |
| 47 | 9 | 7361 | 1227 | 0 |
| 48 | 9 | 7515 | 1271 | 0 |
| 49 | 9 | 7674 | 1316 | 0 |
| 50 | 9 | 7837 | 1362 | 0 |
The recorded day and night values are the same for this profile.

Vampire boyaress · Supernatural
Xanthe
Xanthe’s fight at Howling Keep combines long lashes, floor glyphs and healing orbs. A nighttime confrontation preserves the option to drain her for Blood Surge.
The Silts
Reach Chariklea’s room
Progress Xanthe’s Court activities until Leonard brings the lamp for The Cycle of Love. Move the blue lanterns between the keep’s statues to open passages through the red growth. Note which passage each lantern is holding open.
Watch the floor and the orbs
Block ordinary lashes as you approach, then take a short opening. If a glyph forms beneath Xanthe at close range, retreat. When three small glyphs follow Coen, keep moving until the sequence finishes before counterattacking.
At health-segment breaks she rises and creates red orbs. Destroy them to interrupt her recovery: the first break has three orbs and the second has four. Save enough stamina to leave the larger ground glyph.
Blood and separate rewards
Begin at night if you want the draining option. Scarlet Shield can support recovery through successful blocks when it is equipped. A blood phial in the cathedral treasury is another route to Blood Surge.
Chariklea’s fate is decided in a separate conversation. Vrakhir’s Treads are in the chest in her room; they are not the Corrupted Pendant associated with Xanthe.
Rewards, quests and connections
Useful next steps
Character and story
Related quests
- Xanthe's Blood Guards: Loophole
- Xanthe's Blood Guards: Teach with Pain
- Xanthe's Blood Guards: Unquenchable Thirst
- Xanthe's Excavations: Bloodied Dagger
- Xanthe's Excavations: Malevolent Presence
- Xanthe's Excavations: Unsealed Secrets
- Xanthe's Recruiters: Come Home
- Xanthe's Recruiters: Just a Bit More
- Xanthe's Recruiters: Taste of Power
- Xanthe's Transports: Chosen One
- Xanthe's Transports: Past Glory
- Xanthe's Transports: When Two Dogs...
Combat values by enemy level
Xanthe, the Dark Mistress
Base enemy values before difficulty and combat modifiers. Choose the enemy’s level, which can differ from Coen’s level. An unlisted value is not zero.
| Enemy level | Health segments | Health per segment | Base melee damage | Base magic damage |
|---|---|---|---|---|
| 1 | 3 | 50 | 31 | 36 |
| 2 | 3 | 50 | 43 | 50 |
| 3 | 3 | 50 | 56 | 65 |
| 4 | 3 | 66 | 69 | 81 |
| 5 | 3 | 82 | 83 | 96 |
| 6 | 3 | 98 | 97 | 112 |
| 7 | 3 | 114 | 111 | 129 |
| 8 | 3 | 130 | 126 | 146 |
| 9 | 3 | 164 | 141 | 164 |
| 10 | 3 | 202 | 157 | 182 |
| 11 | 3 | 226 | 176 | 205 |
| 12 | 3 | 250 | 196 | 228 |
| 13 | 3 | 276 | 218 | 253 |
| 14 | 3 | 303 | 240 | 279 |
| 15 | 3 | 330 | 263 | 306 |
| 16 | 3 | 359 | 288 | 334 |
| 17 | 3 | 433 | 314 | 364 |
| 18 | 3 | 514 | 333 | 387 |
| 19 | 3 | 577 | 354 | 411 |
| 20 | 3 | 675 | 375 | 436 |
| 21 | 3 | 783 | 397 | 461 |
| 22 | 3 | 837 | 419 | 487 |
| 23 | 3 | 968 | 442 | 514 |
| 24 | 3 | 1111 | 466 | 541 |
| 25 | 3 | 1268 | 497 | 577 |
| 26 | 3 | 1442 | 528 | 614 |
| 27 | 3 | 1632 | 561 | 652 |
| 28 | 3 | 1732 | 596 | 692 |
| 29 | 3 | 1963 | 632 | 733 |
| 30 | 3 | 2049 | 669 | 777 |
| 31 | 3 | 2141 | 707 | 822 |
| 32 | 3 | 2239 | 748 | 868 |
| 33 | 3 | 2342 | 790 | 917 |
| 34 | 3 | 2384 | 833 | 967 |
| 35 | 3 | 2428 | 878 | 1020 |
| 36 | 3 | 2473 | 912 | 1059 |
| 37 | 3 | 2519 | 947 | 1100 |
| 38 | 3 | 2567 | 983 | 1141 |
| 39 | 3 | 2616 | 1020 | 1184 |
| 40 | 3 | 2667 | 1058 | 1229 |
| 41 | 3 | 2719 | 1097 | 1274 |
| 42 | 3 | 2773 | 1138 | 1321 |
| 43 | 3 | 2828 | 1179 | 1370 |
| 44 | 3 | 2885 | 1222 | 1420 |
| 45 | 3 | 2944 | 1267 | 1471 |
| 46 | 3 | 3005 | 1312 | 1524 |
| 47 | 3 | 3067 | 1359 | 1578 |
| 48 | 3 | 3131 | 1407 | 1634 |
| 49 | 3 | 3197 | 1457 | 1692 |
| 50 | 3 | 3265 | 1508 | 1752 |
The recorded day and night values are the same for this profile.
How to read combat values
Enemy level is separate from Coen’s level. Each table names its combat profile and lists health segments, health per segment and base melee or magic damage before difficulty and temporary modifiers. Day and night have separate rows when the values differ.
A missing value is shown as Not listed; an explicit zero remains zero. The recorded profiles cover levels 1–50. Named creature encounters such as The Unblinking Blasphemy are in the creature directory.