THE FIELD GUIDE
Mireleaf Bracers: Burial Mural, Sarcophagus and Effects
Mireleaf Bracers are inside Deep Down’s central sarcophagus. Inspect the murals and the burial scene’s bracers beneath the woman’s head, then use Loot at the coffin; the lid can still look closed after the pickup list appears. Our level-4 copy showed 33 armour, −7.2% Block Stamina Cost and +2.4% Weapon Critical Hit Chance.
Reach the round chamber during Deep Down
The prologue route begins with Gavril’s search for Lazar near Blackwater Hollow. Follow the underground route into the ruins and continue to the round chamber with a sarcophagus at its centre. This is the bracer location, before the Forgotten Guardian fight.
The surface map marks only an acquisition area, not the underground interaction. Follow the quest route to the chamber and look for the murals and central coffin. The bracer and treasure markers both point to this one sarcophagus search, not to two separate rewards.
Inspect the burial scene’s separate clue points
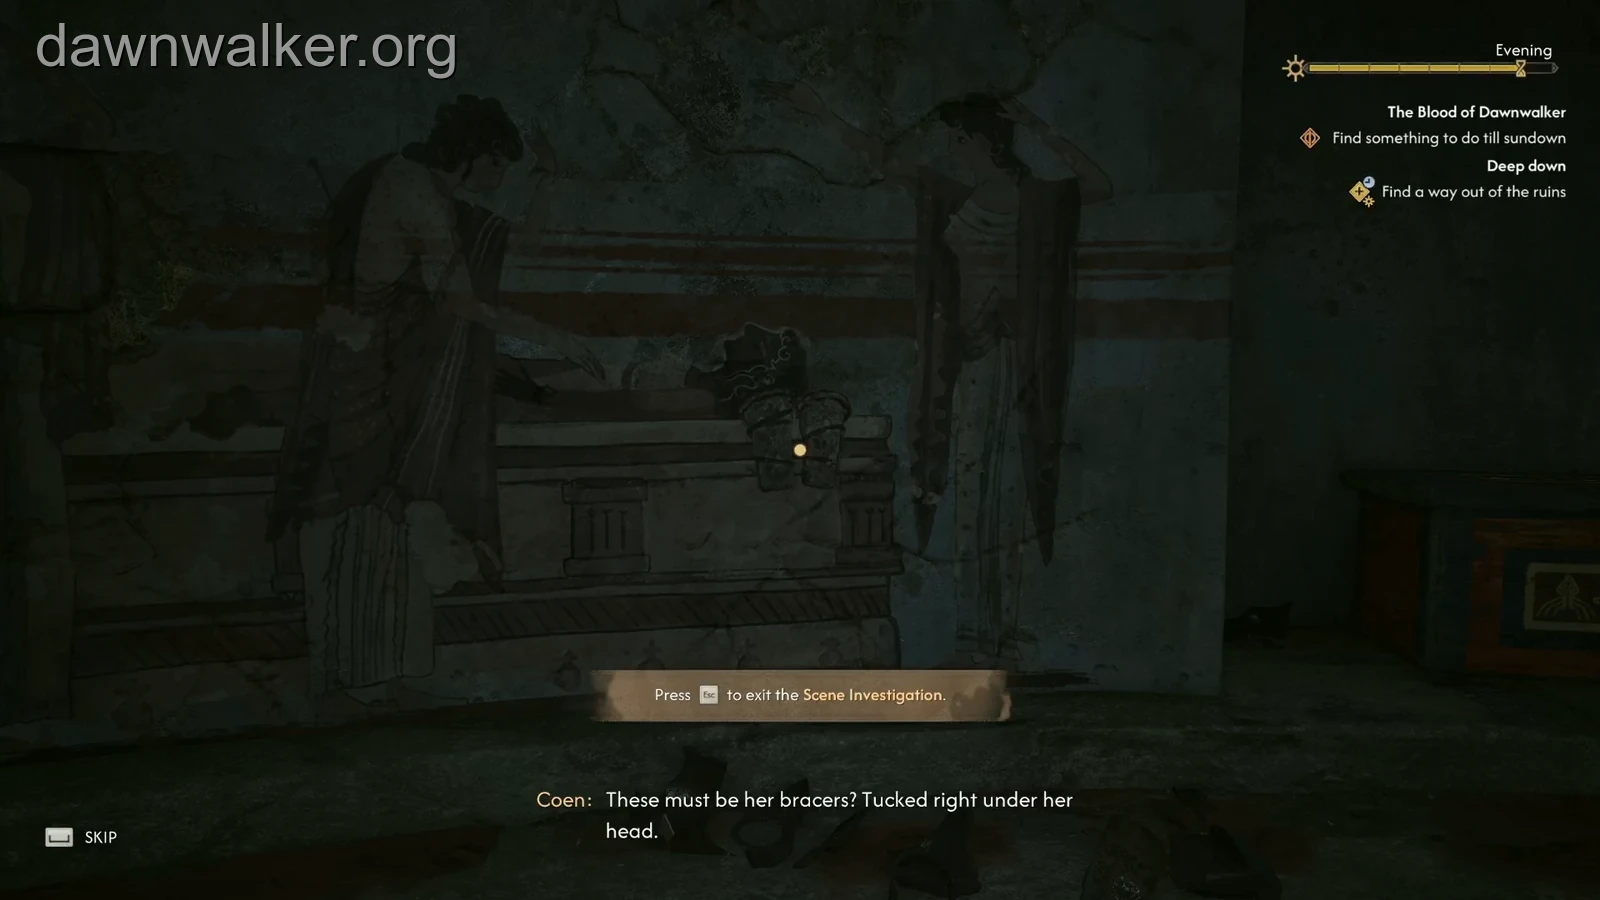
Inspect the murals around the chamber, paying particular attention to the final burial scene. Enter its Scene Investigation view and move the camera over the glowing clue points. Hold the displayed investigation input long enough to complete each observation; entering the close-up alone is not the whole investigation.
The burial scene has separate points for the sarcophagus, the mourners and the bracers beneath the woman’s head. Examine the item detail, not only the painted coffin; Coen’s “Huh. Maybe they’re still there?” confirms the bracer observation. Our route also inspected the other murals, so check those too instead of relying on the final clue alone.
If Loot is still unavailable, review unexamined mural points before treating the coffin as broken. Once the coffin has shown its pickup list, you do not need to repeat the murals.
Use the prompt, not the lid, to check the coffin
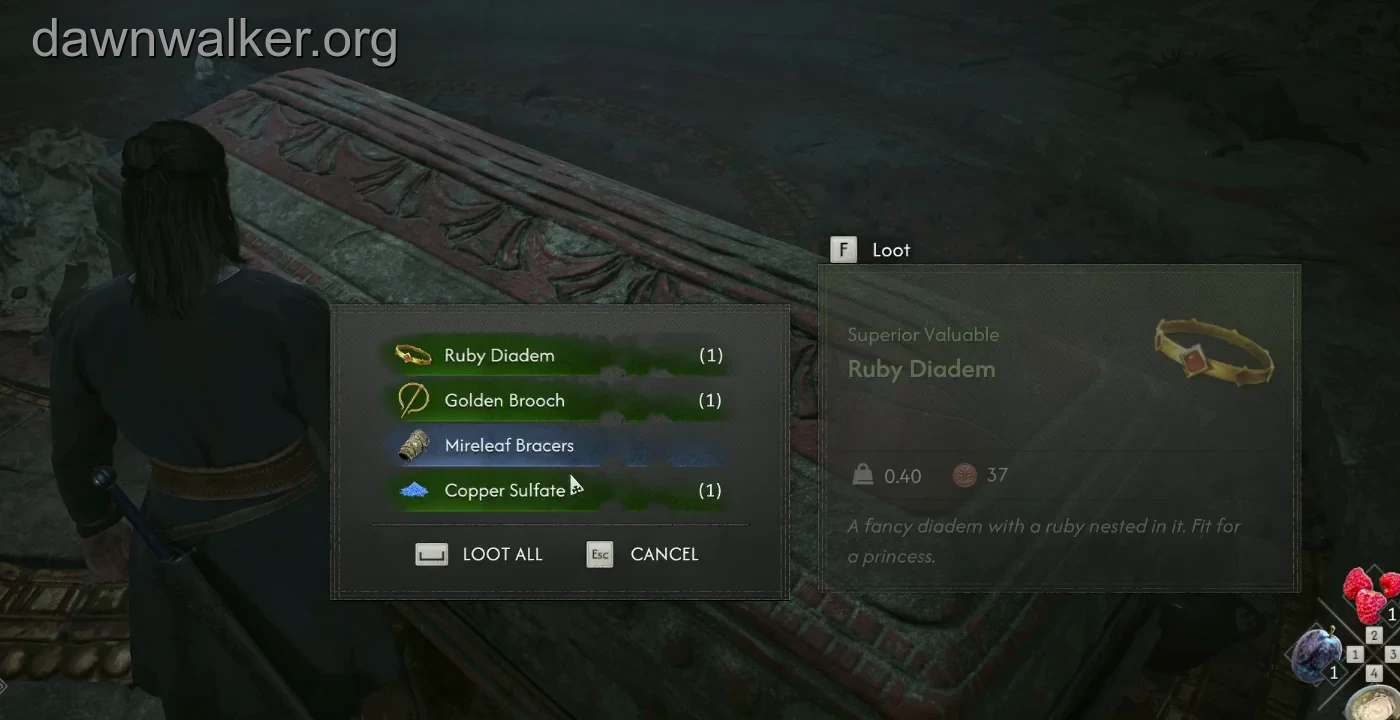
Leave Scene Investigation and approach the central sarcophagus. On default PC controls, F opens the pickup interface when the prompt says Loot. Take the bracers or use Loot All. Our list also held Ruby Diadem, Golden Brooch and Copper Sulfate; other saves may differ.
The lid does not visibly open. In our visit, the list opened, Loot All was selected and the next prompt became Inspect, with Coen commenting on charred bones. Seeing Inspect means you have moved on to the remains, not that the pickup failed.
If the coffin now offers only Inspect, open Inventory and look for Mireleaf Bracers before repeating the murals. If a Loot list remains, take the item from it.
Read the effects on your copy
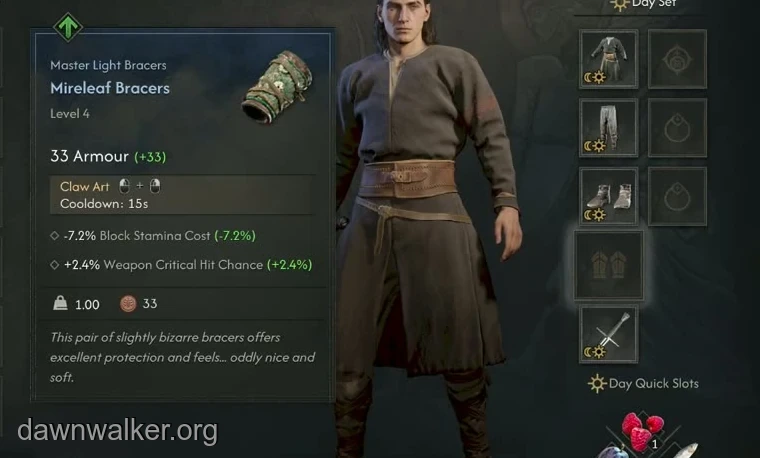
Our copy was a level-4 Master Light hand item. Its tooltip listed 33 armour, −7.2% Block Stamina Cost and +2.4% Weapon Critical Hit Chance, plus a Claw Art entry with a 15-second cooldown. The armour directory’s base profile shows 24 armour, −7% and +2%, so the effect values, not just armour, differ between copies. Read the tooltip on your own pair.
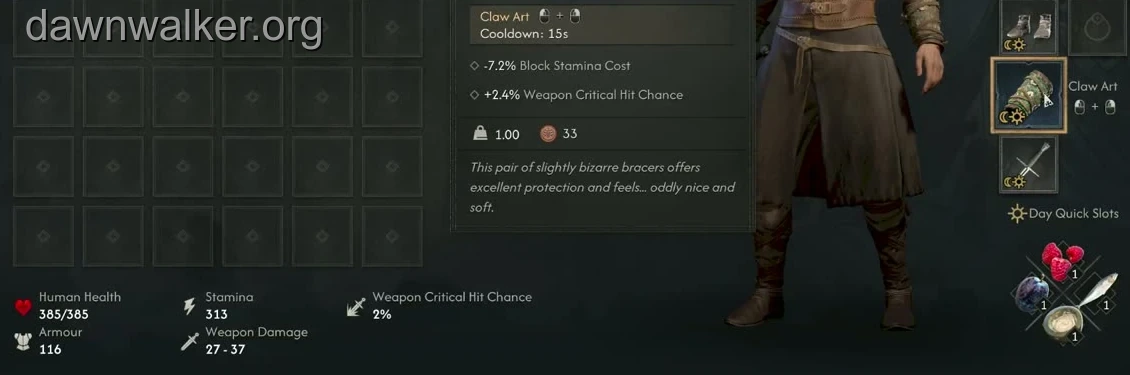
Before you equip them, the green figures compare the bracers with your current hand item; ours matched the full values because the hand slot was empty. After equipping, the character panel’s armour rose from 83 to 116 and Weapon Critical Hit Chance from 0% to 2%. The panel showed 2% rather than the tooltip’s 2.4%, so use the tooltip for the exact figure.
The tooltip names Block Stamina Cost only; it does not reduce dodge or attack costs. Because successful directional blocks spend no stamina, the reduction matters most when you rely on Omniblock.
| Property | Our level-4 copy | Note |
|---|---|---|
| Rarity / slot | Master Light bracers / Hands | Compare with your current hand item. |
| Armour | 33 | Panel total went from 83 to 116 when equipped. |
| Block Stamina Cost | −7.2% | Matters most with Omniblock. |
| Weapon Critical Hit Chance | +2.4% | Panel showed 0% → 2% (rounded). |
Equip the active set before facing the Guardian
Owning the bracers and wearing them are separate checks. Choose Equip for the active set, or Equip in Both Sets, then confirm the bracers appear in the hand slot and the prompt changes to Unequip.
Equip them before the nearby Guardian, especially if your hand slot was empty. They do not remove the need to dodge his unblockable twin-sword attack; use the fight guide once you are equipped.
If you already wear other gloves or bracers, read the green and red differences in the tooltip against that item and keep the effects that suit how you fight.
Check merchant stock if you need another route
Mireleaf Bracers are also associated with the Maragir armourer’s daytime stock. His selection and rarities change with progress, so check the actual shop.
For the Deep Down route, take the sarcophagus pair before leaving the ruins. A merchant copy can have a different level and different values.
Places in this guide
Search area
Deep Down Treasure
In the Deep Down cave, inspect every mural in the chamber before opening the sarcophagus.
Open on the mapSearch area
Mireleaf Bracers
During Deep Down, inspect all the murals around the cave chamber before searching the sarcophagus for Mireleaf Bracers.
Open on the map