THE FIELD GUIDE
How to Beat the Forgotten Guardian
Dodge the Forgotten Guardian’s glowing unblockable twin attack, wait for the whole sequence to finish and counter with one strike after an opening. Equip your bracers, keep stamina available and prepare healing before entering the hall.
Reach the hall and prepare your equipment
This is the Guardian encountered inside Deep Down’s ruins. From the central sarcophagus chamber, follow the east-side corridor into the long hall. The full missing-brother investigation and rescue timing belong to the quest walkthrough.
Equip Mireleaf Bracers after searching the sarcophagus. Then inspect your active equipment set, rather than assuming a pickup is already worn. Compare weapons in your inventory as well, and use a stronger suitable sword if you already have one. In a recorded preparation screen, the player was level 3 with 116 armour and 27–37 Weapon Damage; those are an example loadout, not a required threshold or a promise of victory.
Have a healing consumable ready before engaging. Minor Mending Ointment was available in that inventory and showed 30% Human Health Restoration. Put the item you intend to use into a quick slot and check its displayed use control.
PC controls for a simple defensive loop
These are default keyboard-and-mouse controls. Rebound keys take priority; holding L shows the contextual control guide. Keep the camera on the Guardian so a direction change does not hide the next attack.
Release right mouse before clicking left mouse, then return to your guard after the counter. Holding both buttons together is a different input from an ordinary single strike. This distinction matters if you are trying to counter but keep producing the wrong action.
| Action | Default input | Use |
|---|---|---|
| Target Lock | Middle mouse button | Toggle a lock on the selected enemy. |
| Block | Right mouse button | Defend against blockable attacks. |
| Side dodge in combat | A or D with Space | Move out of an unblockable attack. |
| Ordinary counterattack | Release right mouse, then click left mouse once | Take a short opening and return to defence. |
| Control guide | Hold L | Confirm your current bindings and quick-item controls. |
Read the whole attack before countering
When your difficulty shows the incoming-direction cue, use it to choose your guard against ordinary swings. Duelist omits that cue. A well-timed Perfect Block creates a counterattack opening; take a single strike, then defend again while the Guardian recovers. During your first attempts, surviving an ordinary swing is more important than trying to turn every block into a perfect one.
The glowing twin-sword attack is unblockable. Move out of it with a sideways dodge and watch for the second hit. Do not begin your counter simply because the first swing missed: wait until the sequence has finished.
If stamina is low, stop the attack chain and create space to recover before re-engaging. Repeated attacks and unnecessary dodges make it harder to keep stamina available for the next defensive action.
Reduce the pressure and use healing in time
For learning the fight, the full Story preset in Update 1.1 lowers the pressure and assists guard-direction selection. You still have to perform defensive actions, and unblockable attacks still call for a dodge. The previous Story preset was renamed Forgiving when the easier Story mode was added.
Under Customise, Action controls timing and combat assistance, while RPG changes enemy health, damage and player combat stamina costs. Lowering only RPG can make mistakes less costly while keeping your selected Action timing; it does not provide the same action assistance as selecting the full Story preset.
A useful beginner rule is to look for a healing opportunity around half health. That is a coaching threshold, not a game requirement. Wait for an attack sequence to finish, move clear and use your prepared item rather than continuing to exchange hits with only a small health segment left.
Change the part of the loop that caused the damage
The reviewed failed attempt showed rapidly falling health followed by continued close-range engagement. It did not record the player’s keys or confirm the difficulty, so it cannot prove a particular missed block. The actionable change is to plan a recovery opportunity before the next exchange rather than keep attacking with a nearly empty health bar.
For your next attempt, prepare the quick-slot item first and decide when you will disengage. If the same low-health situation returns, wait out the attack sequence, make space and heal. If health is stable but you cannot produce a counter, check the block-to-attack input transition instead. Change the part that is failing, rather than simultaneously changing your gear, difficulty and every attack input.
Watch a recorded successful encounter
Use the clip to watch two things: how long the glowing attack sequence continues, and where the Guardian pauses afterward. Pause or replay that section before practising. The recorded 32-second win is a demonstration of the encounter, not a completion-time target.
Search the remains, then continue to the surface
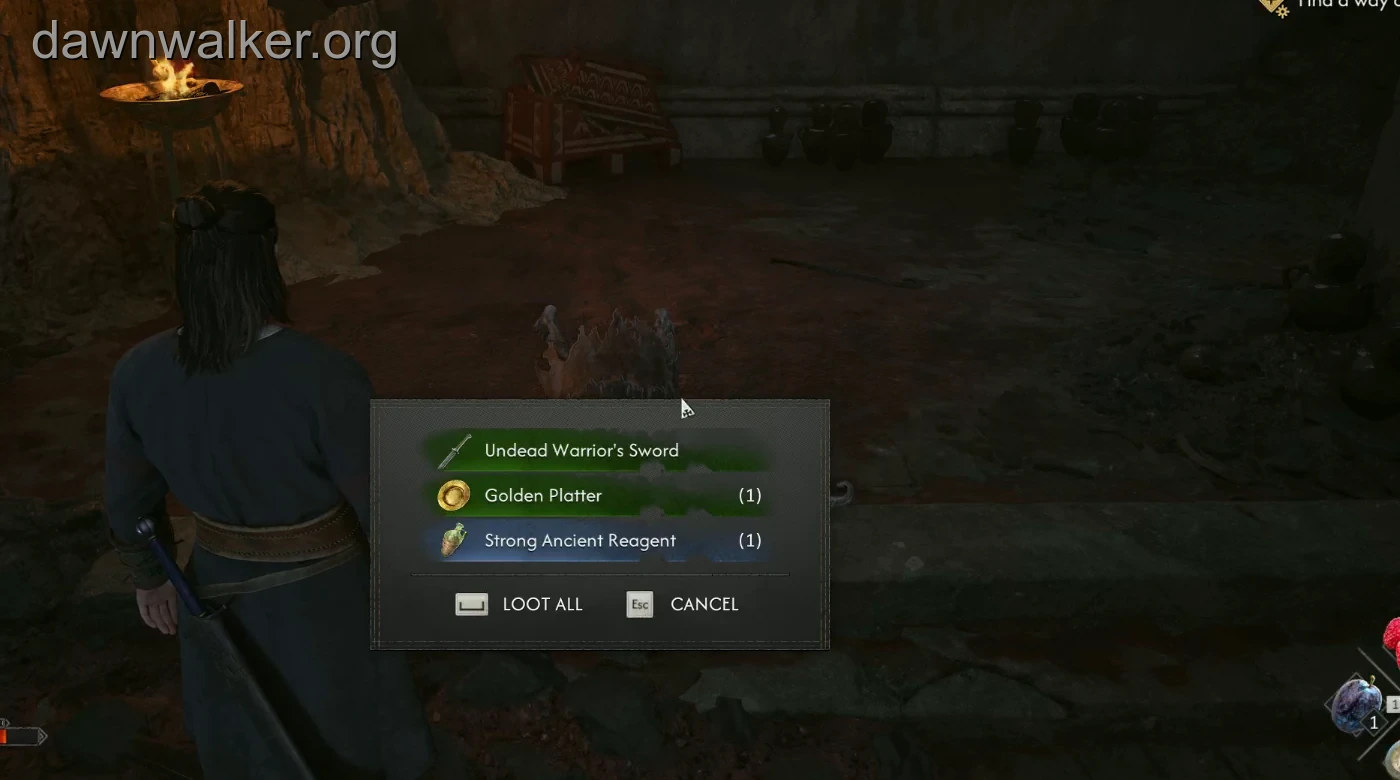
After winning, search the remains for Undead Warrior’s Sword. The recorded list also contained valuables and an ancient reagent, but other loot is a container result rather than a guarantee of the same complete list on every visit.
Continue toward the far end of the hall, up the passage and through the final narrow rock opening. Reaching the surface changes Deep Down to “Return to Gavril”. The fight ends before the quest hand-in, so finish the family conversation when you return.