THE FIELD GUIDE
Dawnwalker Ending Routes and Final Choices
Attack alone, join Lacra, fight with Crake’s rebels or accept Brencis’s bargain. Your route and your family’s survival affect the ending. Keep a manual save before departure and watch the rescue deadline.
Save before the final departure
Major story spoilers follow. Keep the save from outside the final assault after finishing the game: it lets you revisit ally preparations, purchases and optional conversations. An autosave inside the castle is already beyond those preparations.
- Check the remaining rescue time, including any extension already earned.
- Finish the current preparation objective for your chosen ally.
- Complete personal quests and collect equipment you want to use in the assault.
- Spend the skill points you intend to use, equip the resulting abilities and prepare suitable healing items.
Which quest starts each ending route?
| Route | Quest to follow | Departure |
|---|---|---|
| Alone | A Lone Wolf’s Hunt | Enter Greifberg through its side entrance when ready to face the castle without an allied assault. |
| With Lacra | Midnight Reckoning | Complete Our Rotten Roots, wait a full in-game day and speak to Lacra at Westridge Outpost Tower. |
| With the manumits | Rise at Dawn, then Fall Before Dusk | Finish the preparations and outpost operation, then report to Marat for the final strike. |
| Brencis’s bargain | A Deal with the Devil, or the solo confrontation | Listen to the terms and accept the betrayal of an ally if you want the bargain outcome. |


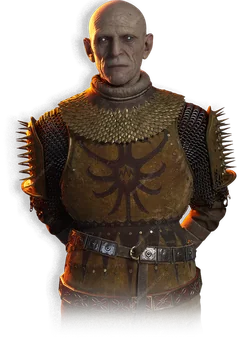
An invitation does not commit you to a bargain
A Deal with the Devil gives you an opportunity to hear Brencis’s offer. Accepting his terms is the consequential choice; simply receiving the invitation does not mean you have chosen that ending.
For Lacra, “It’s time to deal with Brencis.” commits to Midnight Reckoning. Choose “You had some idea to talk through?” first if you still want The Night of Horrors and its optional rewards.
Crake’s personal story in Distant Shadows and A Closer Look is separate from the rebels’ final operation. Finish those conversations before Rise at Dawn if you want both his disclosure and the rebellion route.
Does running out of time prevent every ending?
The campaign begins with 30 days to rescue Coen’s family. Saving them depends on reaching the rescue before their deadline. A later victory can become an act of revenge; it does not bring family members back.
The assault journals include revenge outcomes, so expiry of the rescue window is different from immediately ending the entire campaign. Read the current objective and family state when choosing what to do next.
The Sanzhani Tsarina has a special reward that adds one day when that dialogue option is available. Treat the extension as an earned reward and check the updated clock; it is separate from her exchange in The Ring.
What changes in the main outcomes?
The assault determines who helps Coen reach Brencis and who can remain in power. The family rescue and individual character fates add further differences within a route.
Solo victory: The Folk Hero
Defeating Brencis on A Lone Wolf’s Hunt is associated with The Folk Hero. The journal distinguishes rescuing the family from avenging them after their deaths, so a solo victory alone does not establish that the rescue succeeded.
After winning, the concluding conversation lets you leave Brencis to die or invite him in. This happens after the battle and is separate from submitting to him before it.
Rebel victory: The Knyazmaker
Fall Before Dusk is the manumits’ assault and the route associated with The Knyazmaker. Its endings can differ in whether Catalin survives to rule and whether Marat lives to see the victory; the journal includes both a sacrifice by Marat and an outcome where both live.
The Knyazmaker concerns the rebellion’s result. The Manumit concerns Crake’s earlier personal disclosure. Completing one does not substitute for the other questline.
Lacra’s attack: Midnight Reckoning
Lacra leads the approach through the ruins beneath Svartrau and accompanies Coen through the castle. Her route supports both a family-rescue result and a revenge result when the rescue opportunity has been lost.
The final confrontation can also change your agreement with her. Follow the ending dialogue in the Midnight Reckoning walkthrough to distinguish continuing with Lacra from accepting Brencis’s offer.
Accepting Brencis’s terms: The Turncoat
Brencis can remain in power if Coen accepts his bargain. In the solo-route account, Coen trades information about the rebels or Lacra for permission to leave with surviving family members. That agreement is associated with The Turncoat.
Keep the pre-bargain save if you also want to fight him. Accepting an offer before combat and deciding what to do with him after a victory are separate branches.
Solve the solo route’s maze and collect the correct cell keys
In the rooms before Xanthe’s maze, read the note about following banners. The emblem to follow is a black eye with tentacles on a red field. Use it to identify the route through the repeated rooms and continue through the moving bookcase.
Loot the Key to the Upper Cells from the defeated guards to open the upper cells. The hellhound handler farther down carries a separate Prison Cells Key. Open the corresponding cells and speak to their prisoners as you progress.
Earlier Boyar encounters change some castle defenders. A dead Boyar can be replaced by another enemy, so keep healing available between named boss fights.
Home Sweet Home and Together Forever
The door at the top of Silts Tower begins Home Sweet Home, an early ending built around repeating the opening events with Coen’s family. Staying in the sequence leads to Together Forever.
Keep a manual save before opening the door if you want to view this outcome and then resume the rescue campaign. The repetitions happen inside this quest; they are not five complete playthroughs. Missing the family’s rescue deadline is a different event.
- Open the door on the top floor of Silts Tower and enter the dream sequence.
- Defeat the two enemy groups and the gargoyle at the end of each loop. When the well becomes available as an exit, continue the loop instead if you want Together Forever.
- Complete four cycles, then speak to the family at the beginning of the fifth to remain with them.
Continue after the fight: Things Will Be Different Now
On the solo family-rescue route, the story continues in Laslea. Follow the errands for Rainer’s blanket, Gavril’s peat, the forest snares and Pieter’s house repairs. Afterward, obtain the potion at Anca’s hut and follow the nighttime objective toward the cave.
The meeting with Neberu continues Lunka’s story. Keep following Things Will Be Different Now rather than stopping when the Brencis fight ends. To explore a different assault afterward, load the manual save you kept before departing.
Places in this guide
Search area
Home Sweet Home
At the top of the tower, inspect the door and open it to begin Home Sweet Home.
Open on the mapSearch area
A Lone Wolf's Hunt
Prepare to confront Brencis without allies and look for a chance to catch him off guard.
Open on the mapSearch area
Things Will Be Different Now
Return to Laslea and work through the preparations for winter. On the solo family-rescue route, the later errands lead to Anca’s potion and a nighttime objective toward the cave.
Open on the mapSearch area
A Deal with the Devil
Consider Brencis’s invitation to a parley at Shrike’s Crag after you disrupt his plans. It may be a trap or an opening to save your family; simply hearing his terms does not choose the bargain ending.
Open on the mapSearch area
Rise at Dawn
Seize Eastridge Outpost first so Catalin’s troops can enter, then proceed toward Greifberg.
Open on the mapSearch area
Midnight Reckoning
Midnight Reckoning enters the journal after Our Rotten Roots; wait one full in-game day, then return to Lacra at Westridge Outpost Tower. Choosing “It’s time to deal with Brencis” begins the final assault and closes unfinished quests, so keep a separate save before leaving.
Open on the mapSearch area
Distant Shadows
Speak with Marat about the important matter he wants to discuss.
Open on the mapSearch area
A Closer Look
Follow up on Marat’s angry reaction and try to understand what lies behind it.
Open on the map