THE FIELD GUIDE
The Cycle of Love: Howling Keep lantern puzzle
The Cycle of Love takes Coen through Howling Keep to confront Xanthe. Move the lanterns between statues to preserve a way onward, use the kennels as a return route and open Chariklea’s room. The steps below explain which lamps to leave in place and which to recover.
Get Leonard’s lantern and enter Howling Keep
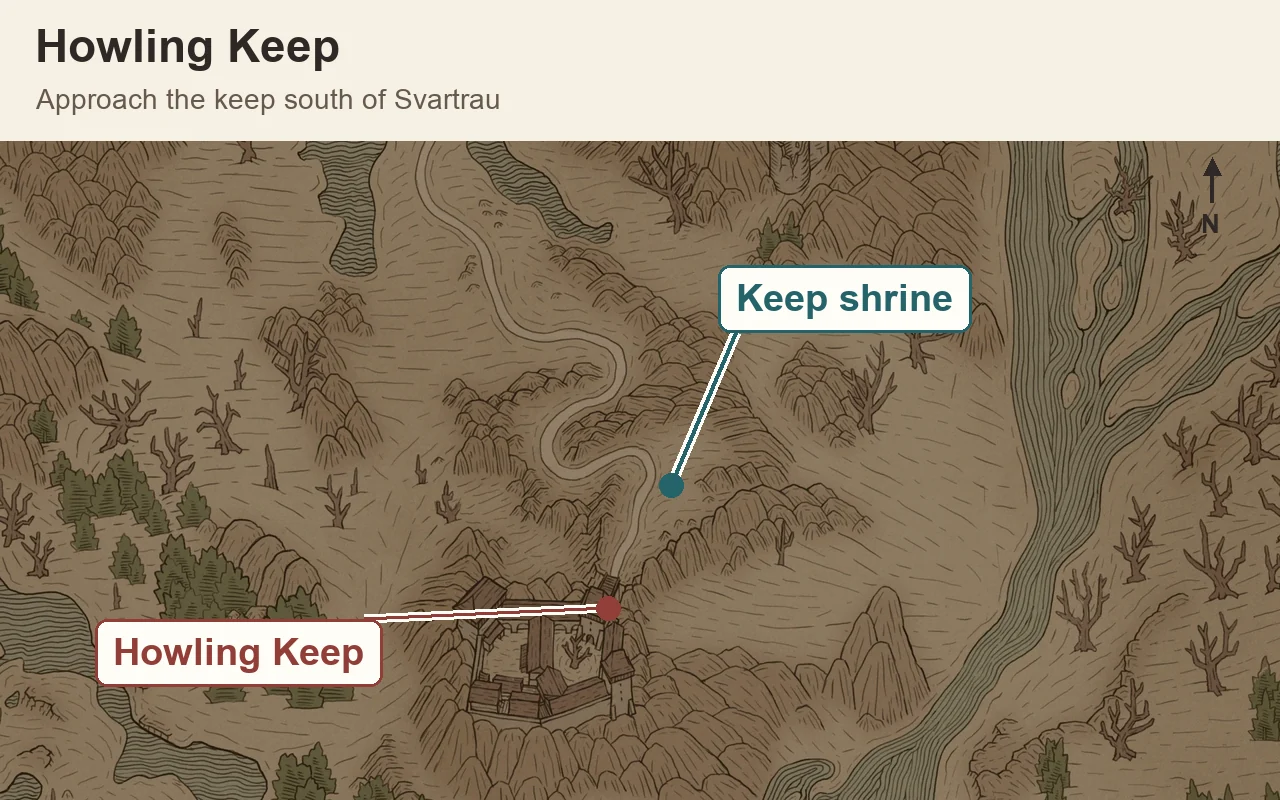
Disrupt Xanthe’s Court activities until her Anger reaches the confrontation threshold. Leonard and another soldier approach with a request to investigate the missing women. Accept their request to receive Xanthe’s Lantern, then travel to Howling Keep in the southern part of the valley, south of Svartrau.
Defeat the enemies outside and place the lantern in the statue to the left of the entrance. Its blue light clears the red growth over the doorway. Inside, expect supernatural enemies to appear as you move between areas; finish the immediate fight before arranging the lamps so an attack does not interrupt a transfer.
Allow four time segments for the quest. If you want to drink Xanthe’s blood after the fight, plan the confrontation for nighttime; that choice depends on Coen’s form. The lantern puzzle itself does not require a night movement ability.
Borrow the upstairs lantern without closing your exit
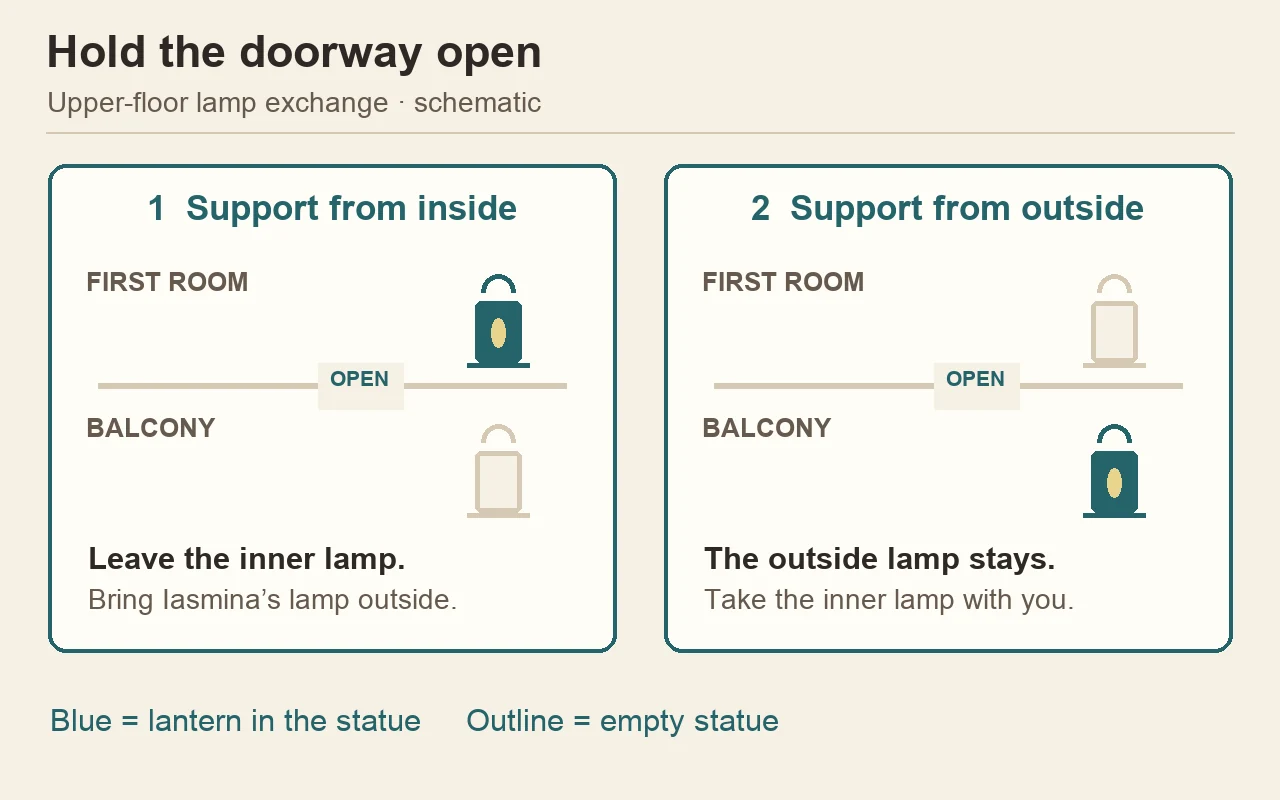
From the entrance courtyard, climb the southern stairs and go through the open doorway. A statue already holds a lantern inside. Leave it there initially and continue into Iasmina’s room, where the dressmaker is working. You can speak with her about the household before taking the lantern in her room.
Carry this lamp outside to the statue on the balcony beside the stairs. Once it is seated, return indoors and take the lamp you left in the first room. The outside statue now keeps the passage open, so you can leave carrying the second lamp.
This exchange explains the keep’s main trap: a lamp can be available to pick up while still being needed to hold your exit open. If the doorway closes after a removal, restore that lamp and supply the other statue before trying again. Track the passage a statue controls, rather than collecting every visible light immediately.
Check the room halfway down the stairs
With the balcony lamp still in place, walk partway down the stairs and enter the newly accessible side room. Put your carried lamp in its statue to open the adjoining room. Search the shelves for the Cycle of Ruin and Dirty Trick manuals; a note here also points toward A Friend Like This.
This is a useful detour if either manual is missing from your collection. The books unlock access to skills rather than paying their learning costs. After searching, retrieve the lamp used in the side room, leave, and collect the balcony lamp. You should now carry both recovered lamps into the main courtyard.
Bring a third lamp back through the kennels
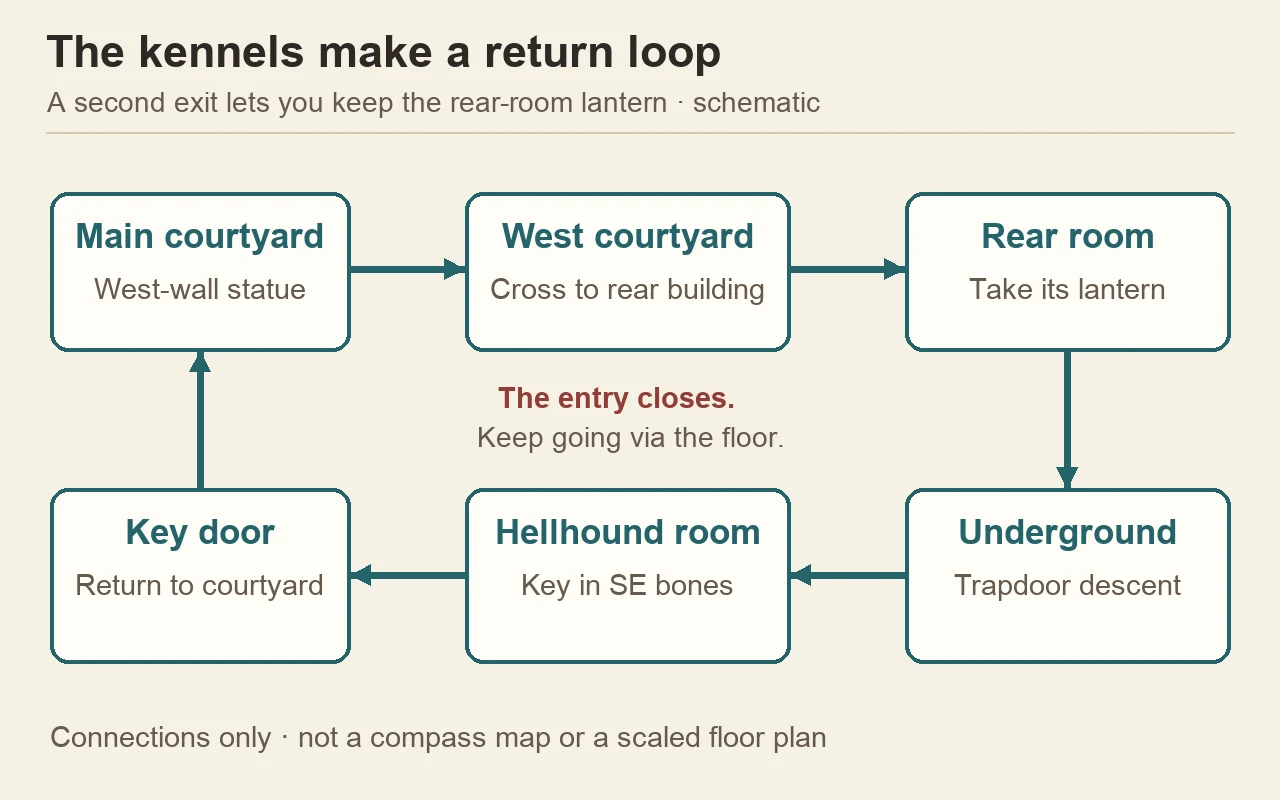
Place one lamp in the statue beside the ground-floor doorway on the west wall. Cross into the western courtyard and clear its enemies. Enter the building at the back, where another statue holds a lantern. Take that lantern; the entrance closes behind you, making the floor opening your way onward.
Find the trapdoor with Focus Mode and descend. Fight through the underground enemies until you reach the room with three hellhounds. Once it is safe, search the bones in the southeast corner for Key to the Kennels. Use that key on the nearby wooden door to return to the entrance courtyard.
Now retrieve the lamp from the western entrance statue. More enemies appear when you do, so deal with them before returning upstairs. This loop matters because the key gives you a separate exit: you can keep the lamp from the rear building instead of putting it back to reopen the door you entered.
Make the western upstairs detour if you need a relic
Before opening the final room, you can take a lamp up the western stairs to open the two rooms on that balcony. The left room contains The Relic of St. Dasius. This detour is worthwhile if you want the amulet or still need a suitable saint’s relic for the Arbiter armour request.
Check the linked relic guide for its room landmarks and the cost of sacrificing it. Collect the lamp again when leaving these rooms; keeping it installed here would leave you short at the final door.
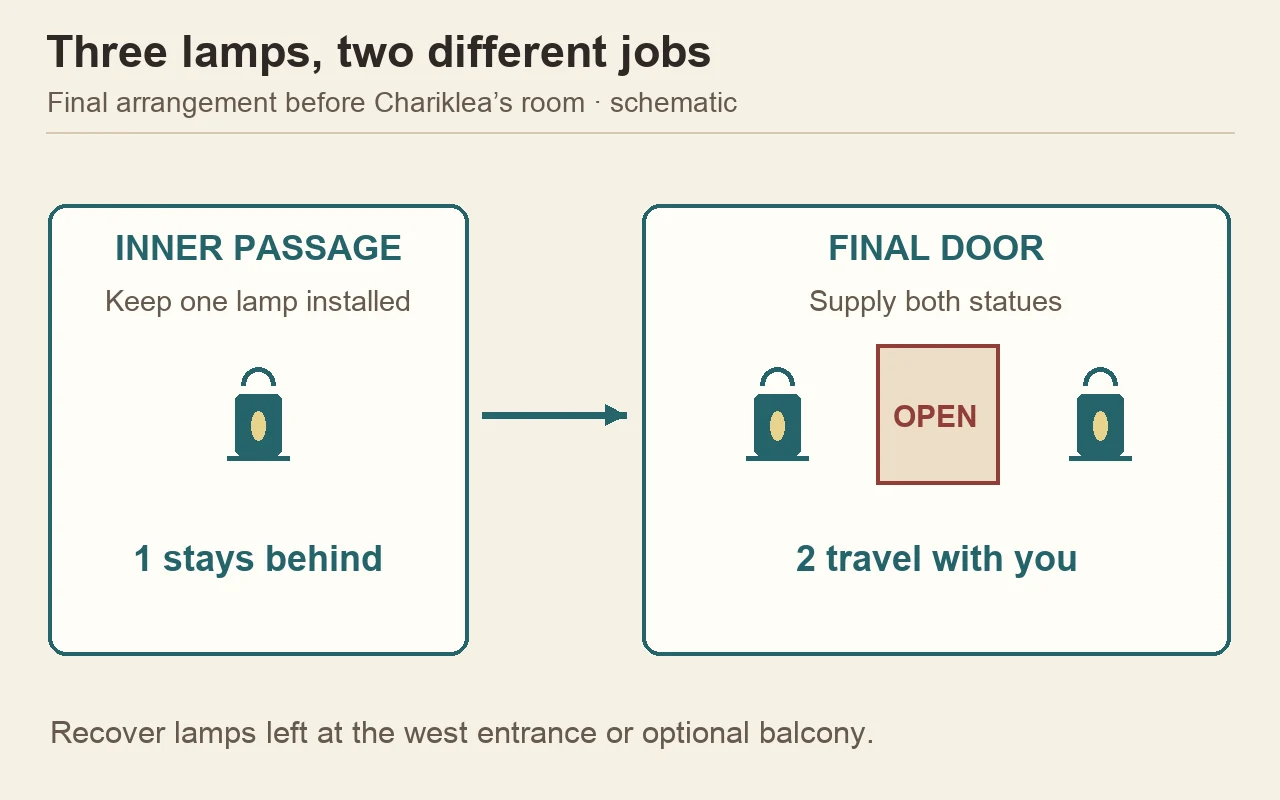
Leave one lamp inside and carry two to Chariklea
Return to the first staircase. Place a lamp in the outside statue, go indoors, and put another in the statue in the first room. Then step back outside and retrieve the balcony lamp. The indoor statue is now responsible for keeping the route open.
Continue through the far doorway with your two spare lamps. Place one in each of the statues beside the final stairway. Both must be supplied at the same time. Enter Chariklea’s room and speak with her; the conversation brings Xanthe into the scene and starts the fight.
If you reach the pair with only one lamp, check the western balcony, the manual room and the ground-floor west entrance before dismantling the indoor arrangement. A lamp left at one of these optional or completed passages is still tied up there.
Resolve Xanthe’s offer and search Chariklea’s room
Use the Xanthe encounter guide below for her lashes, floor glyphs and healing orbs. After defeating her, resolve her offer to cooperate or choose to kill her; drinking her blood is available in vampire form. These decisions concern Xanthe, while Chariklea’s fate is handled separately.
Before leaving the keep, return to Chariklea’s room and search its chest for Vrakhir’s Treads. They are room loot, so inspect the chest rather than expecting the boots among Xanthe’s remains. Completing the quest awards 500 XP. The blood guide explains the alternative route to Blood Surge if you spare her.