THE FIELD GUIDE
The Beast of Balaur: cave route and Ciprian
The Beast of Balaur begins in the mountains west of Parlita. Follow the footprints from Mount Balaur Shrine, pass through the low opening inside the cave, defeat the beast and investigate Iancu’s body. The final step is reporting your discovery to Ciprian in the village.
Find the mountain trail west of Parlita
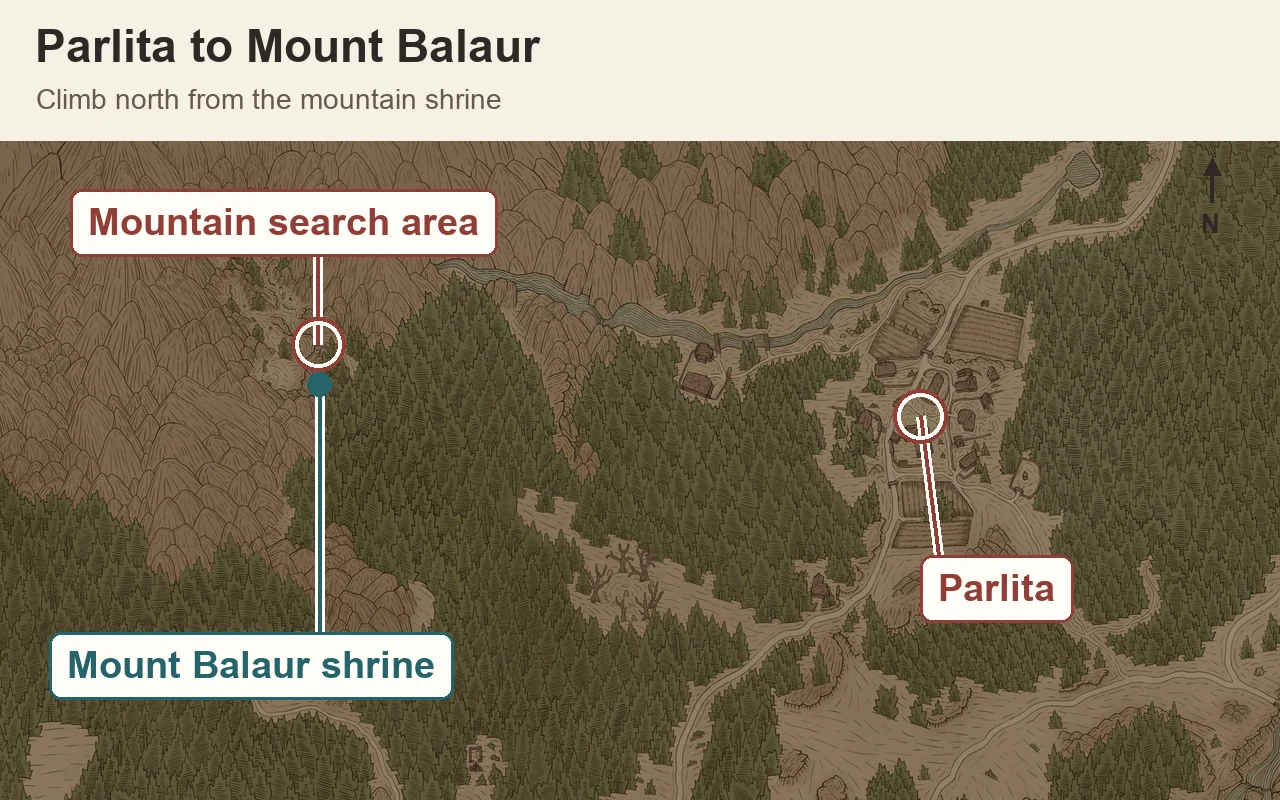
Head to Mount Balaur Shrine on the western edge of Boar’s Back. It lies west of Parlita and northwest of The Wallows. From the shrine, climb the rocks to the north and enter the mountain search area; exploring this area can start the quest directly.
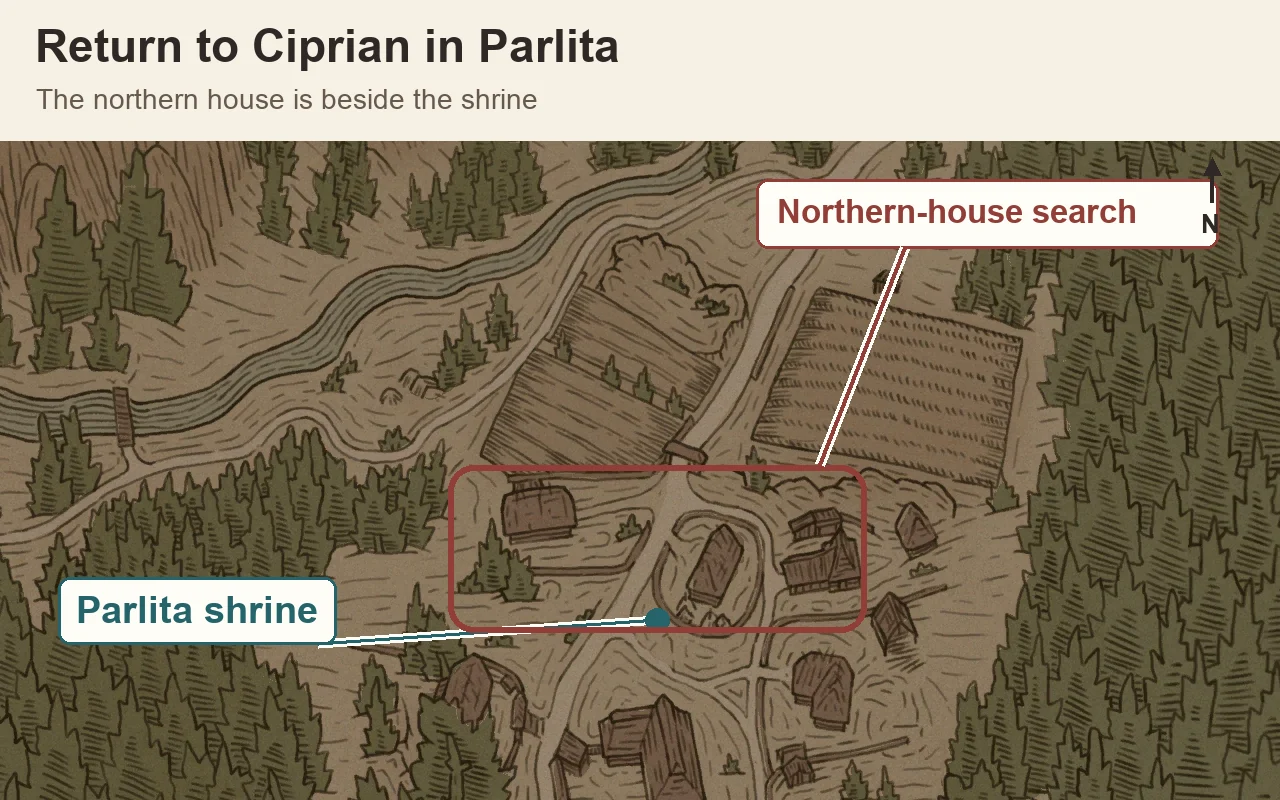
You can also begin with the person worried about the missing man. Ciprian is in the house on the north side of Parlita, beside the village shrine. Ask him about Mount Balaur and offer to investigate. This gives the search a personal context before you find the tracks, but you do not need to return to town just to obtain permission if the mountain objective has already appeared.
Choose the time of your visit according to what you want from the cave. The disappearance investigation works during the day or at night. A separate hidden chamber needs nighttime Shadowstep, so a night visit is useful if you also want the optional equipment described later.
Take the left branch and look for the low passage
Use Focus Mode to reveal the fresh footprints leading away from the shrine. At the fork, follow the left path uphill. The tracks are more useful than aiming straight at the centre of the quest marker, because the terrain requires a climb along the mountain path.
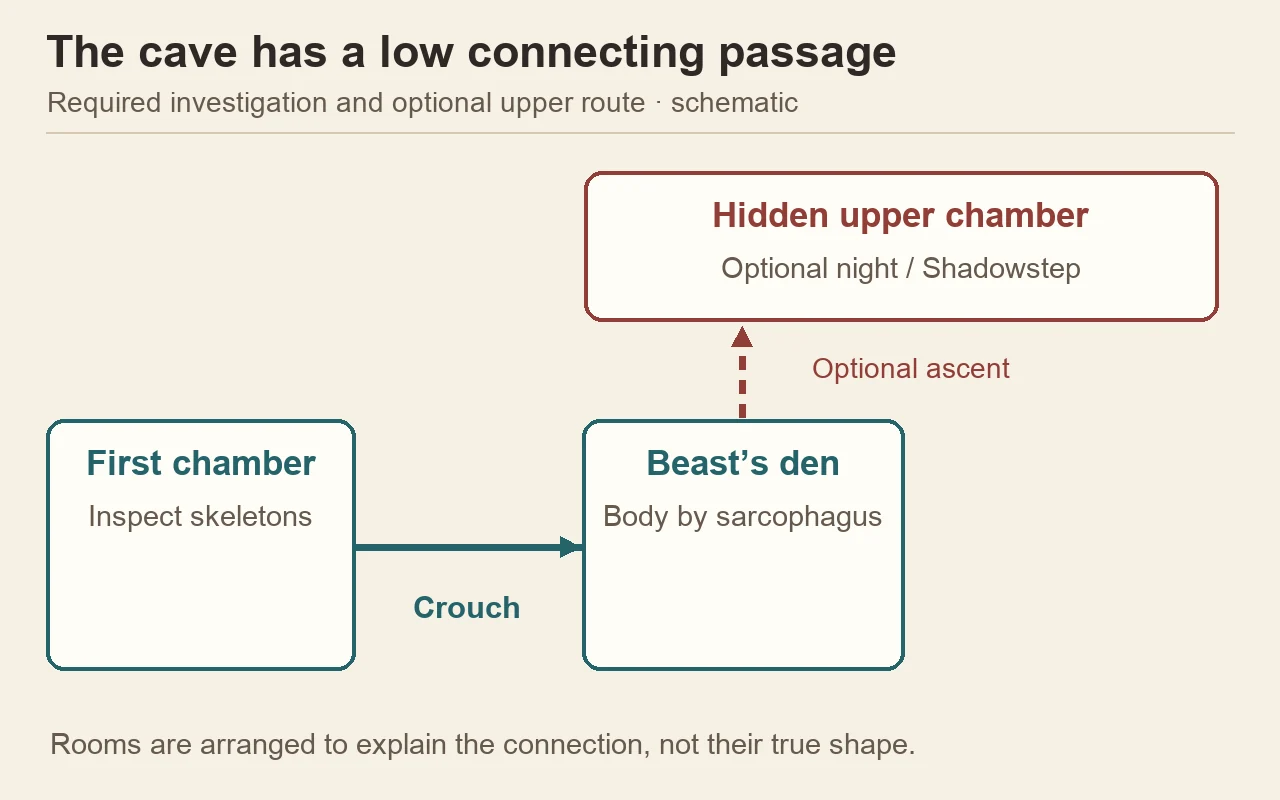
Enter the cave and inspect the skeletons in the first chamber. Continue toward its back and look for a low opening that requires crouching. This leads into the beast’s den. If you have found bones but no living enemy, search for that opening before turning back; the encounter is beyond the first room.
Let the beast finish its lunge before countering
The Beast of Balaur is a supernatural, wolf-like enemy fought alone in its den. Its lunging attacks make distance a temporary defence: watch the approach, dodge the lunge, and use the opening after it passes to land a short counterattack.
If you already carry Supernatural’s Bane Brew, this is a suitable encounter for its enemy-type damage bonus. It works in either form. Use an existing supply if the beast is giving you trouble; the quest does not require a special potion, so you can attempt the fight without first interrupting the investigation to gather ingredients.
Investigate the body beside the sarcophagus
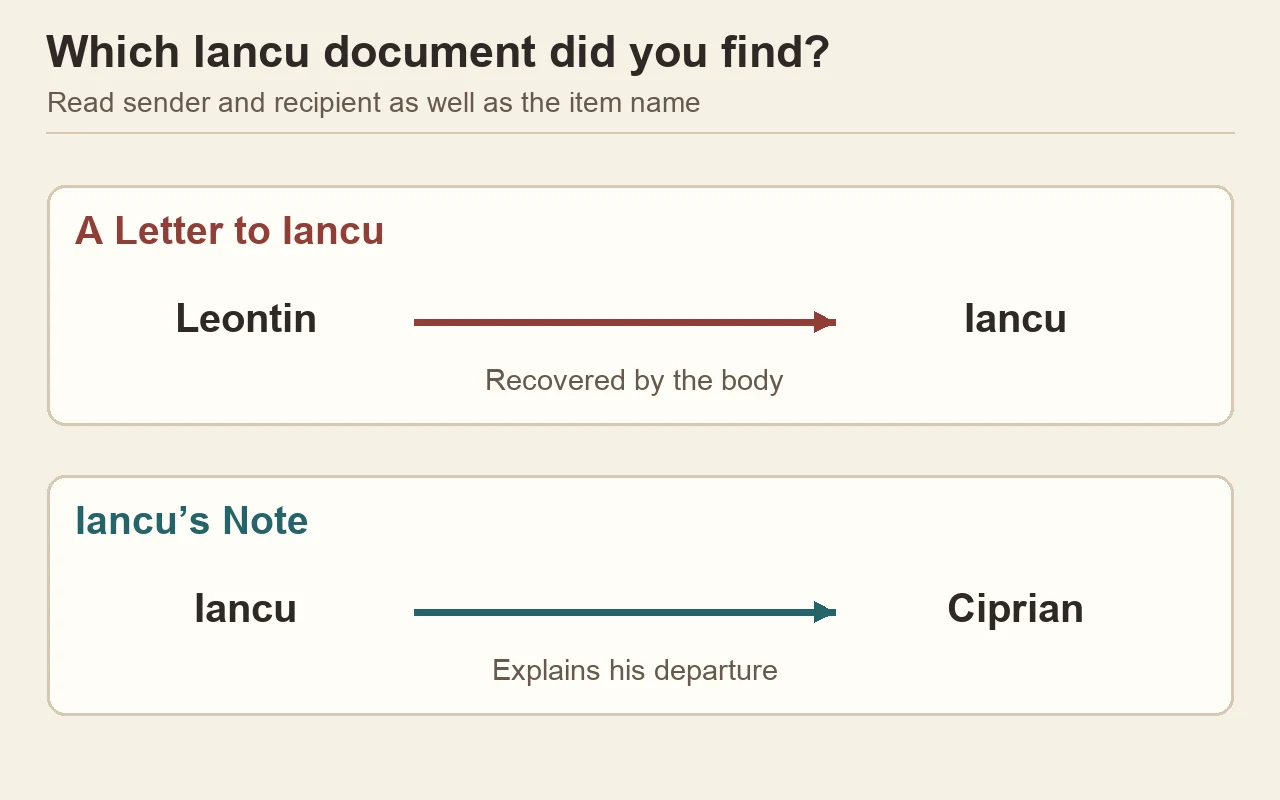
After the fight, search the body near the sarcophagus and collect A Letter to Iancu. This is the evidence that identifies the missing man and moves the investigation toward a report in Parlita. Inspect the human remains as well as the defeated creature before leaving the chamber.
The letter is easy to confuse with Iancu’s Note, another document connected to this story. A Letter to Iancu is the message he received from Leontin; Iancu’s Note is the message he left for Ciprian. Their directions of correspondence explain why one is useful as evidence in the cave while the other supplies background to his departure.
Leontin’s message connects an old report of a beast on Balaur with the disappearance of Iancu’s birth parents. Iancu’s own note says he left without a farewell that might have changed his mind. Together, they explain why he chose this dangerous mountain instead of treating the rumours as a reason to stay away.
Decide whether to search the upper chamber
The hidden passage above the den contains Gladius and a Phial of Brencis’s Blood. These are exploration pickups, separate from proving what happened to Iancu. If you came only for the quest, you can return to Parlita after the body investigation.
For the treasure detour, you need nighttime and Shadowstep to reach the raised passage. Use the existing Gladius route below for the climb and chest. If you are here during the day or have not learned the ability, leave this optional search for a later visit instead of looking for another ground-level door.
The phial grants access to Piercing Shriek and increases Corruption. Before consuming it, check the blood-ability guide if you already own that power, since a later drink can advance its rank. Finding a rare item and deciding when to use it are separate choices.
Return to the northern house in Parlita
Descend from the mountain and return to Parlita. Find the house on the north side of the village beside Parlita Shrine, go inside, and speak with Ciprian. Tell him about the body you found on Balaur. This closing conversation spends three time segments and completes the quest. This step requires Ciprian to be alive and available to speak; the cave discovery does not deliver the report for you.
Check your remaining time before selecting the report, especially if another appointment is close. The reward is 250 XP; Gladius and the blood phial are not handed over by Ciprian and should not be expected in this conversation’s rewards.
If the journal is still asking you to explore the cave, return to the remains near the sarcophagus and finish that investigation first. If it already asks you to seek information in Parlita, the required next step is the conversation in town. This distinction tells you whether the unfinished work is evidence collection or reporting, without repeating the battle.