THE FIELD GUIDE
Ocha Questline: Andrei’s Ring, Nora and the Elder
Meet Ocha at the Altenmarkt tavern in western Svartrau to begin The Heart Wants What It Wants. For her hex, take Andrei’s Ring and choose “The ring. Must be important.” Distract the guard with the pigs, mark the window, then meet Ocha and Nora by the river. If you also accepted A Mother’s Plea, return to the Elder after Ocha has made her decision.
Start at the tavern, with or without the Elder’s request
Ocha waits near the back of the Altenmarkt tavern in western Svartrau. Speak to her, finish the fistfight she starts and agree to help when Nora intervenes. Their problem is Andrei, who controls their lives through his criminal business.
A Mother’s Plea is an optional lead into this meeting. The Heart Wants What It Wants can begin at the tavern without it. Check which quest your journal actually lists before searching for a missing objective: the Elder’s request and Ocha’s personal problem have separate endings.
Story and outcome spoilers follow. Ocha’s personal choice concerns her life with Nora and her clan; this is separate from Coen’s romance routes.
 Ocha
A Mother’s Plea: preserve the village conversation
A peaceful entry into the Uriashi village during Song of the Mountain keeps the Elder’s request available. Ask about her request, follow her to the sacred obelisk and inspect its handprints. She then sends you to find her daughter Ocha.
Go to the Altenmarkt tavern for Ocha. The other leads are unnecessary if your immediate aim is to find her. Complete Ocha’s problem in the city before returning to report her decision.
If you want the Elder’s quest and the good-outcome opportunities around Ocha, preserve a save before the village confrontation and use the peaceful approach. Being able to start Ocha’s tavern conversation does not guarantee that every later village or achievement outcome remains available.
Choose a route into Andrei’s hideout
Both approaches aim to obtain a personal item without starting the rescue fight early. The night route is the shorter preparation route if you can already use your vampire traversal abilities: it bypasses the paid information and silver needed for the daytime introduction.
Save before entering if you want to compare the hex and combat outcomes. Going downstairs and attacking Andrei commits to a different sequence; it is unnecessary when your current objective is to collect his memento.
| Approach | What to prepare | What to do |
|---|---|---|
| Night: upper-floor entry | Vampire traversal abilities and a route to the south balcony. | Enter upstairs and stay there while searching for the ring. Avoid the lower floor where Andrei and his men are present. |
| Day: butcher-shop introduction | Silver to show the butcher; Katja offers paid information about gaining entry. | Find Katja north of the shop, identify yourself as Nora’s friend and follow the silver-trading introduction. Treat Andrei respectfully until he leaves an opening to take a memento. |
Take Andrei’s Ring and select it in the conversation
At night, approach the south side of Andrei’s hideout and use your vampire traversal to reach the balcony. Enter the upper floor and search the small chest on the desk. Focus helps identify the objects; Andrei’s Ring is the one you need.
The daytime conversation creates a different opening to take an item. Keep the exchange respectful; “You know how to handle it, that’s for sure” works here. When Andrei leaves, choose the ring.
Leave with the ring and speak to Ocha outside. If you collected several possessions, explicitly choose “The ring. Must be important.” Having the correct object in your inventory is only half the task: your response must identify it for her spell.
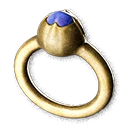 Andrei’s Ring
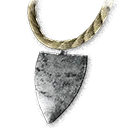 Andrei’s Pendant
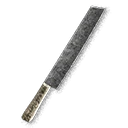 Andrei’s Cleaver
Distract the guard, mark the window and rescue Nora
Ocha tells you that Nora is missing. To follow the hex route, persuade Ocha to keep to the plan instead of storming the hideout.
- Find the pigpen beside the hideout and open its gate. The escaped pigs draw the guard away from the window.
- Move to the marked window after the guard leaves and interact to draw Ocha’s hex symbol.
- With the ring selected, the spell makes Andrei kill himself and frees Nora from the immediate danger. If you supplied another item, the spell fails and the rescue becomes a fight against Andrei and his men.
- Follow the new meeting objective outside the city. The rescue is not the last conversation in Ocha’s quest.
 Nora
If you already killed Andrei
Killing Andrei and his men before casting the spell brings Ocha into the hideout. She objects to the bloodshed, and the guard-distraction and window objectives are skipped. Continue to the riverside meeting rather than trying to make the missing hex objectives reappear.
If your aim was specifically to see the successful hex, reload the save from before the fight. If you want to continue the outcome you have, use the current meeting objective; collecting the ring afterwards does not replay the spell.
Finish the riverside meeting and choose Ocha’s future
Leave Svartrau to the west and meet Ocha and Nora near the bridge at the riverside objective. Accept the meal if you want the optional crayfish activity. Search the nearby river traps with Focus; finding three crayfish returns you to the conversation.
Ocha is deciding between life among humans and returning to her clan. Two dialogue sequences are below. They influence her future and an epilogue scene. Make this choice for the future you want for her, then finish the conversation before looking for the next quest or shop.
For convenient Swordmastery access in Svartrau, encourage her to stay and later check her teaching offers. Sending her home instead opens a general-merchant opportunity in the Uriashi village; it does not add a blacksmith, and no particular manual is guaranteed in stock.
Show the stay-in-city and return-home dialogue sequences
- To encourage staying: “Do you miss home?” → “New things can be exciting, sure.” → “Our neighbours helped a bit.”
- To encourage returning home: “Do you miss home?” → “Meh. Nothing better than homemade food.” → “Other villagers just cared about themselves.”
Return to the Elder for her separate reward
Finishing The Heart Wants What It Wants provides the Broad Swing Manual. A Mother’s Plea has its own return trip and Soul Stigma Manual reward, along with information about the sacred stone.
If the Elder’s request is active, return to her in the Uriashi village and report Ocha’s decision. Both the stay and return-home outcomes can complete that request; you do not need to force Ocha home solely to claim the Elder’s reward.
Read each manual to unlock its learning opportunity, then check the skill’s remaining requirements and training costs. Receiving a manual does not automatically learn or equip the ability. Ocha’s later teaching stock is a separate service from the manual earned for completing her quest.
 Broad Swing Manual
 Soul Stigma Manual
Find the missing step in your current objective
| Where you are stuck | Next useful check |
|---|---|
| The Elder has no request. | Check how the village confrontation ended. You can still look for Ocha’s separate starting conversation at the Altenmarkt tavern. |
| You have several mementos. | Select the ring when Ocha asks. The pendant and cleaver do not make the hex work. |
| The guard is still at the window. | Open the pigpen gate and let the guard move away before approaching the window. |
| The hex objective disappeared after a fight. | If Andrei is already dead, follow the riverside meeting objective. The spell steps belong to the other route. |
| Nora is safe, but the quest is unfinished. | Meet Ocha and Nora outside the city and finish Ocha’s decision conversation. |
| You have Broad Swing but no Soul Stigma Manual. | Broad Swing belongs to Ocha’s quest. Return to the Elder if A Mother’s Plea is active. |
Places in this guide
Search area
The Heart Wants What It Wants
Speak with Ocha in the Altenmarkt tavern in western Svartrau about the dangerous situation she has become involved in. This conversation can start her request independently of the Uriashi Elder’s quest.
Open on the mapSearch area
A Mother's Plea
If the Uriashi Elder remains available after the village confrontation, take her request concerning Ocha in the Altenmarkt tavern. Returning with news of Ocha’s choice can bring a Soul Stigma Manual and information about the sacred stone.
Open on the mapSearch area
Andrei's Ring
Reach the roof, then go around the building to its second-floor door to find Andrei's Ring.
Open on the map