THE FIELD GUIDE
Lost Blood Walkthrough
Killing the cave monster is only the first part of Lost Blood. Take the ring and letter to the Silberstein merchant, then return after his shop reopens for the Medicus II Manual. If you found the cave first, you can still follow the investigation.
Start at the wrecked cart or continue from the cave
Look for the overturned blood transport north of Pilgrim’s Trail Shrine in St. Tyna’s Grove. It sits beside the main road, with a trail leading west toward a cave. Use Focus Mode to inspect the cart and pick up that trail.
Your starting point changes the investigation order. If you already reached the cave, follow the objective currently shown in your journal. The quest includes a route that follows the tracks back from the lair to the transport.
| What you found first | What to do next |
|---|---|
| The destroyed cart | Inspect it with Focus Mode, then follow the blood trail off the road toward the cave. |
| The cave and monster | Deal with the creature, inspect its corpse and lair, and follow any remaining investigation or blood-trail objective back toward the cart. |
Finish the fight, then collect both identity clues
The creature inside is a Murohn. Watch for its teleporting movement and leave room to dodge its long-range scream; the scream cannot be blocked. Wait for that attack to pass before moving in to punish it.
Do not leave as soon as the fight ends. The corpse and cave provide different clues: the ring identifies a family emblem, while the letter points toward its author in Silberstein. A journal entry about investigating the lair means there is still work to do after the kill.
- Search the monster’s corpse for the Mysterious Ring. Loot the Phial of Ambrus’s Blood here as well; that blood pickup is separate from the merchant’s later reward.
- Use Focus Mode to finish searching the lair. Pick up Letter from Father near the rock on the southern side of the cave and read it.
- Check for the objective directing you to the letter’s author in Silberstein. If your journal still asks you to investigate the cave or follow tracks, finish that step before travelling to the city.
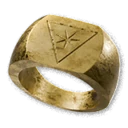 Mysterious Ring: the quest clue
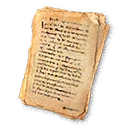 Letter from Father: the Silberstein lead
Find the family-emblem merchant in Silberstein
Visit Silberstein in southeastern Svartrau during the day. The general trader you need is on the southwestern side of that district, at the premises connected with the manumit hideout. Use the merchant landmark below to find the shop.
Match the emblem behind the trader with the ring. Choose “The symbol behind you looks familiar,” then “I found a ring with your family’s emblem.” This is the conversation that advances the investigation; opening his ordinary trading inventory is not the same step.
The trader recognises the connection to his son. Explain what happened in the cave. His reaction can close the shop temporarily, so keep following the quest after this first conversation.
The shop closed: wait for the follow-up visit
If the journal says “Wait until the merchant reopens his shop,” the closure is part of the quest. The trader has withdrawn after hearing about his son; the cave investigation has not failed just because the door is now shut.
Plan for a full in-game day before checking again during daylight. A single switch from day to night is only half a full cycle. You can spend that time on another task you already want to do, or use a waiting option if you are ready to spend campaign time.
Use the journal as your return signal: when it changes to “Go back to the merchant,” revisit the same shop and continue the conversation. Wait for that journal change rather than a particular hour. If the merchant instead refuses to discuss the case because of your actions against the manumits, use the branch explanation below.
The merchant refuses to speak about the manumits
Lost Blood has a separate outcome in which the trader refuses to speak because of Coen’s actions against the manumits. The journal then leaves the mystery unresolved. That response comes from earlier choices, so do not expect waiting to reverse it.
If seeing the family’s conclusion matters to your playthrough, keep a manual save before major faction decisions. A backup from before the refusal’s cause lets you compare another route; a save made after the refusal does not undo the earlier action.
Collect the manual and keep the reward stages separate
Return to the reopened shop and hear the trader out. Accepting his apology finishes the successful follow-up and gives you the Medicus II Manual. The manual grants access to the ranks that require it; you still need to meet the perk’s prerequisites and pay its learning costs.
The name Mysterious Ring is also used by a wearable accessory in the equipment directory. The quest-clue version has no equipment slot or listed combat effects. Do not confuse the two when checking what the corpse clue is used for.
| Item | When you obtain it | What it is for |
|---|---|---|
| Mysterious Ring and Letter from Father | Corpse and lair investigation | Identify the family and find the Silberstein merchant. |
| Phial of Ambrus’s Blood | Loot the Murohn in the cave | A blood pickup associated with Scarlet Shield; separate from the shop follow-up. |
| Medicus II Manual | Successful return conversation after the shop reopens | Access to the Medicus II ranks that require the manual, with learning costs still to pay. |
 Medicus II Manual and other sources
Still stuck? Match the journal objective to the next action
Check the wording of the active objective before repeating the whole route. The quest supports several investigation orders, so a different journal step does not by itself mean your save is broken.
| Current objective or result | Next check |
|---|---|
| Investigate the cart or follow the blood trail | Use Focus Mode at the transport and on the tracks between the road and cave. |
| Search the monster’s corpse or investigate the cave | Check the corpse for the ring and the lair for Letter from Father; the kill alone does not identify the creature. |
| Find the letter’s author in Silberstein | Visit the marked general trader during the day and ask about the family emblem. |
| Wait until the merchant reopens his shop | Let time pass and check for the return objective; repeated clicks on the closed shop do not advance the conversation. |
| Go back to the merchant | Return to the same shop and finish the follow-up conversation for the manual. |
| Refusal over Coen’s actions against the manumits | This is a separate unresolved outcome. Waiting for normal opening hours does not undo that choice. |
Places in this guide
Search area
Lost Blood
Investigate the unusual discovery in a secluded stretch of swamp.
Open on the map