THE FIELD GUIDE
Forge It Anew: Restore St. Mihai’s Sword
Gather three sword shards and the Broken Sword of St. Mihai, reforge the blade with Nareh, then complete the separate imbuing ritual. A shard can start the quest, and you can begin reforging with the broken blade and one shard.
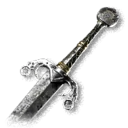
Choose the shard you still need
The three shard activities are separate branches. Pick the one you have not finished, or save each branch you want to follow to your journal. The Executive Order cave provides a lead; its shard is at the soldiers’ camp reached afterwards.
You also need the Broken Sword from the cathedral crypt. You can find shards before that blade, so your first pickup does not have to follow the order used in a walkthrough.
- Do Not Disturb
Maragir Wealds · the defaced shrine inside the cave.
- Hostile Takeover
Boar’s Back / Rockfalls · the nest beyond the large kobold.
- Executive Order
Investigate the emptied cave, then follow the shard to a camp.
Do Not Disturb: search the defaced shrine
Go to the cave in northern Maragir Wealds, in Ambrus’s domain. Focus highlights the yellow markings around the campsite and along the approach.
Follow those markings inside and search the defaced shrine at the back for the sword shard. Inspecting the cave drawing gives leads to the other shard activities.
- Inspect the marked campsite with Focus.
- Follow the markings into the kobold cave.
- Collect the shard from the broken shrine and inspect the drawing before leaving.
Hostile Takeover: clear the nest
The second cave is in the mountains between Boar’s Back and Rockfalls, within Bakir’s domain. Look for the entrance marked with a white X and crouch through the low opening.
A large, poison-spitting kobold guards the interior. Defeat it, then search the nest at the far end for the shard. Winning the fight and taking the piece are separate steps.
Executive Order: the cave has already been looted
Start at the cave between St. Tyna’s Grove and Tantari Woods. The shard is missing from this location, so another sweep for a loose pickup is not the next step.
Use Focus to inspect the bodies and wall painting. The investigation redirects you to the soldiers’ camp in the bog north of Tantari Woods, also used for a Xanthe court activity.
After dealing with the soldiers, search the small box inside the tent for the shard. The Kingslayer can be among the soldiers’ loot, but the sword and the quest shard come from separate searches.
- Inspect the highlighted clues inside the cave.
- Follow the updated objective to the soldiers’ camp.
- Search the tent for the sword shard before leaving the camp.
Get the Broken Sword beneath Svartrau Cathedral
The broken blade comes from Mihai’s encounter in A Monk and a Saint. That investigation can follow Night Terrors or the alternate A Dubious Gift route; choosing one closes the other approach for that playthrough.
On the Albertus route, find him in the unlocked shack at the northern edge of the Middens. Continue the conversation until you can pick up charcoal and answer through the writing on the wall.
Albertus’s charcoal answers
Choose the following subjects in order. These are the answer phrases that identify the saint and his history.
- Abelard the Sorrowful.
- Svartrau Plaza.
- His penance, the place of his redemption.
- Never once set foot inside it.
- St. Mihai, a great warrior, arrived at Vale Sangora.
Follow the cathedral records to the memorial
The cathedral investigation has more than one information source. For the library approach, visit at night and use Shadowstep to reach the balcony and the unlocked upper door. Inspect the cathedral chronicle and records about the crypt.
Once the investigation identifies St. Mihai’s memorial, inspect the second memorial stone from the right in the courtyard. Inside the crypt, use Focus to locate the accessible chamber through the cracks and confront Mihai.
After the encounter, collect the Broken Sword of St. Mihai. It is the starting weapon state, so it still needs the shard reforges and the later imbuing ritual.
Bring the blade and shards to Nareh
Find Nareh, the uriash blacksmith, at Uriashi Hermitage near the tree line in Briar Sloughs. If she will not help, the conversation choice about wanting to kill Brencis opens her assistance.
You can begin with the Broken Sword and one recovered shard, then return after finding the others. Each reforge advances the weapon through an intermediate state; you do not have to wait until all three shards are in your bag before the first visit.
After the blade reaches its Restored state, follow Nareh’s directions to the place where its power can be awakened. The blacksmith stage does not by itself give the final Imbued version.
Complete the ritual northwest of the hermitage
Go to the ancient ruins northwest of Uriashi Hermitage. Use the silver sword to cut through the blood webs blocking the way, then clear the enemies inside.
Climb through the interior to the ritual room and interact with the red orb. Complete the summoned encounter and the following scene to receive Imbued Sword of St. Mihai.
This final stage completes the restoration for Arbiter’s Blade. The Imbued Sword map marker refers to this destination; it does not mark all three shard locations.
- Arbiter’s Blade achievement
Record completion after the final restoration unlock.
Match the name in your inventory to the next step
The five names below are actual stages of this quest’s weapon. Use the full inventory name to see whether a shard reforge or the final ritual is still outstanding.
For damage, weight and effect comparisons, open the existing sword-family reference. Character and item level can change the values shown in your game.
| Sword state | What comes next |
|---|---|
| Broken Sword of St. Mihai | Bring the broken blade and a shard to Nareh to begin reforging. |
| Partly Restored Sword of St. Mihai | Continue the remaining shard activities and return to Nareh. |
| Mostly Restored Sword of St. Mihai | Deliver the remaining piece to finish the reforge. |
| Restored Sword of St. Mihai | Follow Nareh’s directions to the ritual northwest of Uriashi Hermitage. |
| Imbued Sword of St. Mihai | The restoration and final imbuing stages are complete. |
Places in this guide
Landmark / route reference
Uriashi Hermitage
A fast-travel shrine at Uriashi Hermitage.
Open on the mapSearch area
Forge It Anew
Pursue the lead opened by an unusual weapon that may help in the fight against Brencis.
Open on the mapSearch area
Forge It Anew: Do Not Disturb
Examine the camp or follow its trail towards the cave to begin Forge It Anew: Do Not Disturb.
Open on the mapSearch area
Forge It Anew: Executive Order
Investigate the unusual encounter discovered while travelling near Tantari.
Open on the mapSearch area
Forge It Anew: Hostile Takeover
Explore the dark cave you discovered and find out what it contains.
Open on the mapSearch area
Xanthe's Blood Guards: Unquenchable Thirst
Disrupt the veteran instructors training Xanthe’s new Blood Guards to interfere with her military operation.
Open on the mapSearch area
Imbued Sword of St. Mihai
Complete the Forge It Anew quest line to obtain the Imbued Sword of St. Mihai.
Open on the mapSearch area
Broken Sword of St. Mihai
Defeat Mihai at the cathedral to obtain the Broken Sword of St. Mihai.
Open on the map