THE FIELD GUIDE
Buried Past: Volk, Pieter’s Stash and the Final Visit
Start Buried Past with the Maragir grocer, then follow Pieter’s beer order to Volk’s hut. His stories unfold over several visits, with rest periods between them. Complete the training, follow the childhood trail to Pieter’s stash, and take the prayer-book clue to the monastery before your final return.
Plan the visits around Volk’s rest periods
Buried Past is available after the prologue opens the valley. The main delay is the rest between conversations: Volk asks you to return after a day, several times. A conversation or errand that spends one time segment does not by itself finish that wait.
Start a rest period by finishing the current conversation, then use the interval for other activities you already intend to do. Check that the journal has changed from waiting to visiting before making another trip. If the family deadline is still active, budget those waits separately from the actions listed below.
Help Volk and report completed errands to build his goodwill for the ending. The optional tasks affect how he treats you later, but skipping one does not by itself mean the friendly outcome is lost. Story and outcome spoilers follow.
Find Pieter’s meeting place and help Volk
Speak to the grocer near the well in Maragir about Pieter and buy his old beer order for 100 denarii. Follow the lead to the ruined hut in western St. Tyna’s Grove, across the river east of Svartrau. This beer starts the investigation; it is separate from the Slivovitz requested later.
No one answers a knock at the hut. Use Focus outside to inspect the snares and the sword-marked training stump, then search the shed. Resolve Volk’s opening fistfight and explain that you are Pieter’s son. Stay through the conversation about your father until Volk asks to rest.
Ask about the snares and whether he needs help. For firewood, use the axe at the shed, follow the chopping prompts, then bring the wood to Volk. For the wolves, inspect tracks at the broken fence behind the hut, follow them to the den, clear it and report back. Finishing the fieldwork and reporting it are separate steps, so do not leave an errand at its return-to-Volk objective.
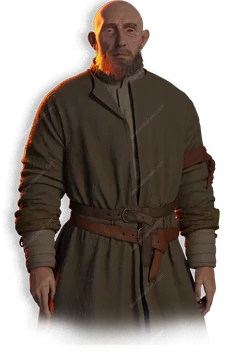 Volk
 Pieter’s Order
Help Volk’s back: optional drink and remedy
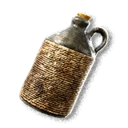
Return after the first rest period. Volk is in bed with back pain. You can give him Slivovitz, available from Svartrau taverns if you have none, but the bottle is not required to hear his next story. Keeping a bottle for the visit avoids an extra shopping trip if you want to make the gift.
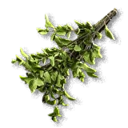
For the optional remedy, ask whether you can help with his back and read the ointment recipe on the shelf. Collect feverfew along the riverbank west of the hut, using Focus to find the patches. Return to the stove to prepare it. Gathering spends two time segments and preparation spends one; these costs are separate from the rest between visits.
Continue the conversation about Pieter and his horse, then allow Volk another day to rest.
Return for training and the treasure lead
After the next rest, Volk is back at his table. Ask about his last adventures with Pieter and continue to the sparring offer. Finish the bout and the follow-up conversation to receive the Artery Strike Manual, even if you lose the practice fight.
If you want Artery Strike for the rest of the route, read the manual and learn eligible ranks at a Road Shrine before leaving for Parlita. The book alone does not purchase those ranks.
Volk then brings up the reward he and Pieter once shared. Agree to investigate and mention the glade near Parlita where Pieter took Coen as a child. This opens the memory trail. Also ask about help around the house: boards and nails behind the hut let you repair the bedroom window.
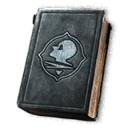 Artery Strike Manual
Retrieve the knife from the roof at night
On the later visit, inspect the vomit outside Volk’s door before asking him about the missing knife. It is stuck partway up the roof. Return at night and use Shadowstep to reach it, then give it back to Volk to finish the errand.
Check for this request when you return for training, and complete it before the final visit. If you arrive during the day, use the time for the window repair or the active investigation, then return in vampire form.
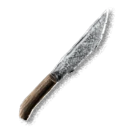 Volk’s Knife
Follow the childhood trail to Pieter’s buried belongings
Begin this search after Volk has raised the treasure and Coen has remembered the glade. Visiting the armour marker early does not unlock the dig. Follow the memory trail in this order:
- In Parlita, inspect the broken-down food stand near the village entrance, then the well. Use Focus and Coen’s comments to follow the trail.
- Leave Parlita southwest, passing the house Coen remembers for its dog. Follow the shrine-side path west into the woods, then use the large stones as landmarks.
- Continue towards the crag and climb to the glade above. Watch for wildlife along the approach.
- Inspect the old campfire and take the nearby shovel. Use Focus to find the ring of stones at the foot of the tree near the camp. Inspect it and dig.
- Take Pieter’s Garb and inspect the prayer book and letter. If the monastery objective has not appeared, check the remaining stash interactions before leaving.
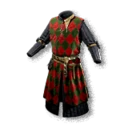 Pieter’s Garb
 Prayer Book from Maragir
Ask the monk about the prayer book, then report to Volk
Take the prayer book from Pieter’s stash to the monk raking outside Maragir monastery. Use that copy for the conversation, rather than another book with the same title. Follow him into the scriptorium to learn that Pieter donated the gold to the monastery; there is no missing purse to collect from a second treasure marker.
Climb the ladder to the monastery’s upper room and search the bookshelves and chest for additional manuals. Check the book names as you collect them. Volk’s Artery Strike Manual comes from the earlier training, so these pickups are optional extras.
Return to Volk and tell him what happened to the gold. Finish the exchange until he asks you to come back after resting. Close out any available help you still intend to give before advancing to the final visit.
Resolve the final visit and collect the right reward
After Volk’s final rest, return to the hut. Earlier help determines whether you find an empty hut or an active ambush. Completing the quest awards 250 XP and one Skill Point; how you obtain Volk’s Sword depends on the ending.
Show the friendly farewell and ambush endings
On the friendly route, Volk has rejected Brencis’s attempt to recruit him against you and left. Outside is a dead soldier with a severed arm; inside is another body with Volk’s Sword. Take the sword, inspect the scene and read Volk’s letter on the table to finish.
For the optional spirit investigation, use the Hacked-Off Hand and Compel Soul on the soldier outside during the day. This is a different body from the one holding the sword inside.
On the hostile route, deal with the soldiers who ambush you, then resolve the confrontation with Volk. You can fight him for the sword or walk away. Leaving him is a valid choice, but does not promise the weapon reward.
 Volk’s Sword
Places in this guide
Search area
Maragir grocer: start the quest
Start Buried Past with the grocer by Maragir’s well. Ask about Pieter and buy his old beer order to begin the trail to Volk’s hut.
Open on the mapLandmark / route reference
Ruined Hut: return to Volk
A fast-travel shrine at Ruined Hut.
Open on the mapSearch area
Pieter’s stash near Parlita
Follow Buried Past to Pieter’s old campsite near Parlita. Inspect the stone circle at the foot of the tree near the campfire, then dig for Pieter’s Garb and the prayer-book clue.
Open on the mapSearch area
Maragir monastery: show the prayer book
After finding Pieter's prayerbook page in the secret glade, return to the monk to learn about the treasure. Then return to Volk and allow another day to pass.
Open on the map